
Presentations are a great way to share information whether it’s a review of a product or providing statistics to shareholders. And you can add Google slides into WordPress to create stylish slideshows in minutes.
Whether for social media, direct linking or even on a WordPress website, a slide show is quite versatile. Some may even use it as an alternative to using a WordPress photo gallery on the website.
Google Slides is the search engine giant’s answer to popular office software. As one of the free office tools available, users can create presentations while having access to powerful tools and features. It’s no wonder why many people prefer to use Google rather than spend hundreds of dollars on alternative software.
What Can You Do With Google Slides in WordPress?
Presentations are used to show products, describe services, share statistics, and a slew of other formats from any type of web hosting. If developed well, they can greatly contribute to inspiring others to act or buy. They can also be used like interactive infographics. Instead of one long image, a presentation can be broken into segments controlled by the reader or set to automatic motion.
In a Public Forum
Presentations can be added to WordPress in a myriad of ways. While many will show these on a separate page accessible from the navigation menu, others will accentuate a post. In reality, it’s up to you regarding how you want visitors to see the slide show.
Presentations can also be used as part of a marketing strategy to encourage sales, leads, or just attract visitors to a website. In fact, many businesses create a series of these slide shows because they have great potential for engaging an audience.
In a Private Forum
What if you have information you only want to show to registered users? Perhaps you have business information you want to display to stockholders or employees in the business. Google Slides can be placed into private pages easily. This could also be a marketing method to inspire users to register.
Today, I’m going to show you how to add Google Slides in WordPress to impress your visitors. Whether this is a private portal or a public website, placing additions such as presentations into your content adds a layer of engagement.
There are two ways to do this. They depend on whether or not you are using the classic editor or the Gutenberg block editor to embed Google slides. Let’s take a look at both methods together.
Note: Both the methods described below assume that you have a Google slides account and have a slideshow presentation ready to roll.
How to Add Google Slides in WordPress
The concept of adding Google slides in WordPress is the same for both methods. That is to say, getting the embed code and putting it on your site is the same. However, there is an extra step we want to look at when it comes to using the Gutenberg block editor.
Method 1: Embedding Google Slides Using the Classic Editor
Step 1: Log In to Your Google Slides Account
Go to the Google Slides website and log into your account.

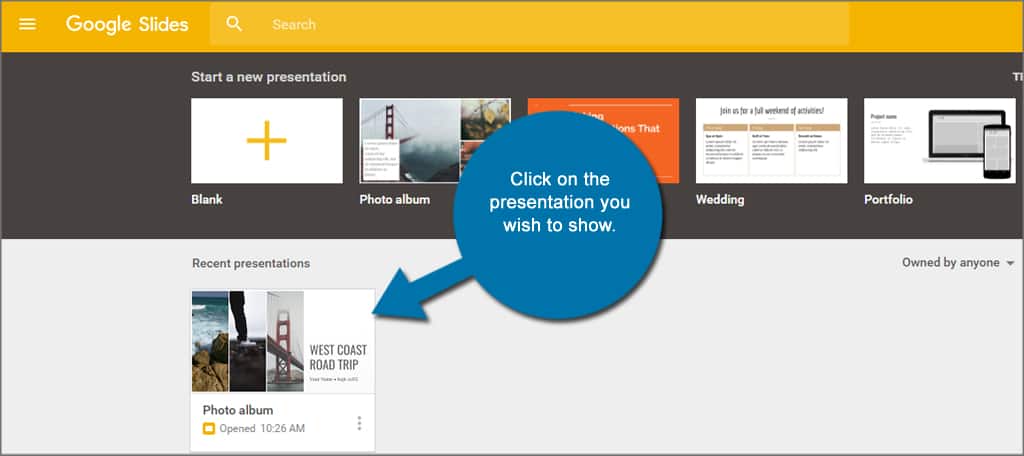
Step 2: Choose Presentation
Click on the presentation you wish to show.
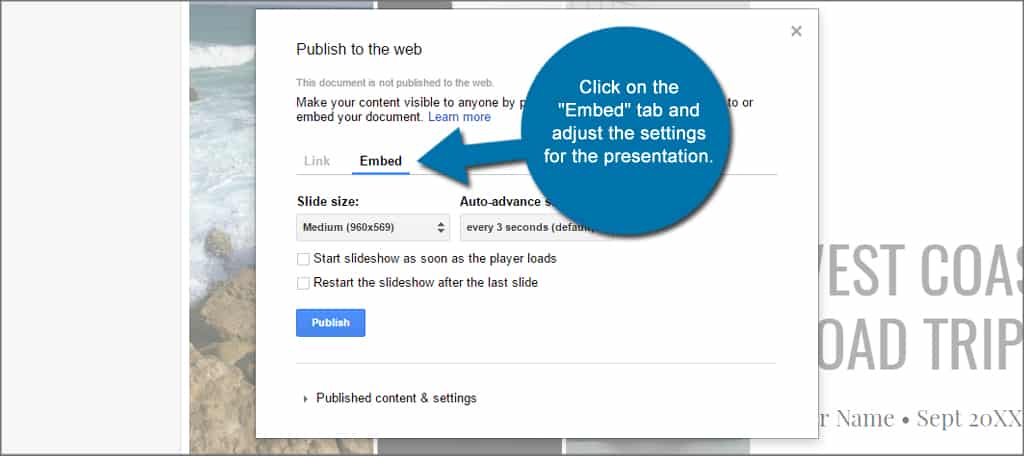
Step 3: Publish to Web
Click the “File” link on the top left and then click on “Publish to the web…” This will bring up a new window to set up your controls.

Click on the “Embed” tab and adjust the settings for the presentation. This will let you change the size of the view, the rate of automatic advancing, starting the slide show immediately, and restarting at the end. For now, I’m simply going to leave the settings as default.
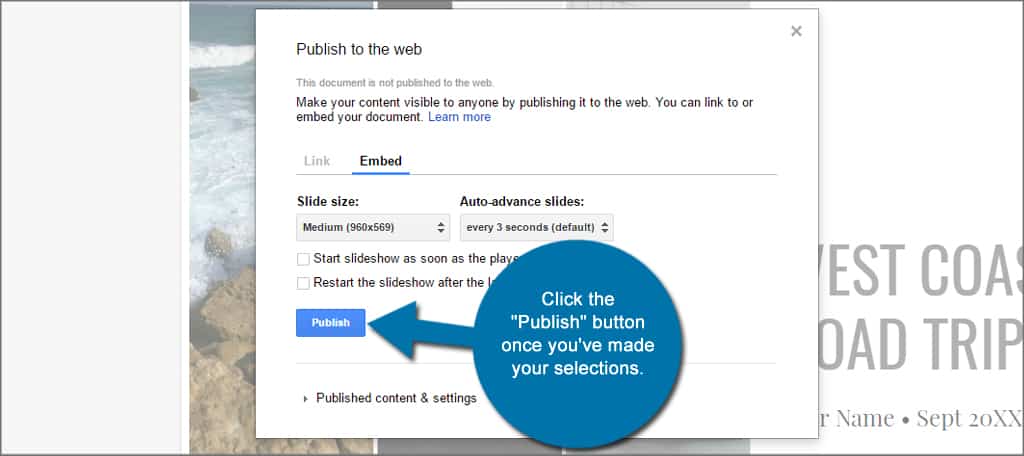
Click the “Publish” button once you’ve made your selections. Google will ask if you’re sure you want to publish the presentation. Click OK on the pop-up if or when it appears. Depending on the browser you’re using and the settings, you may not see this confirmation window.
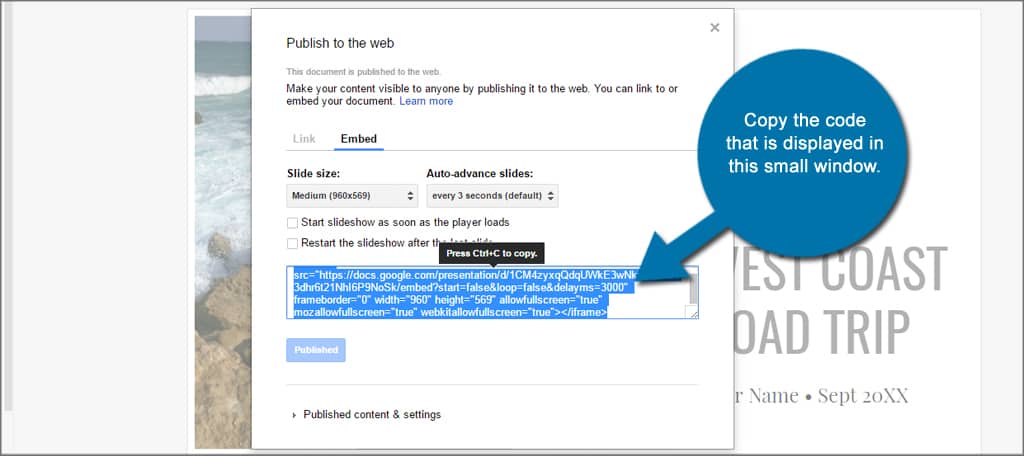
Step 4: Get Embed Link
A new section will appear under your slide show’s settings. This is the compilation of code based on the settings you chose. Copy the code that is displayed in this small window.
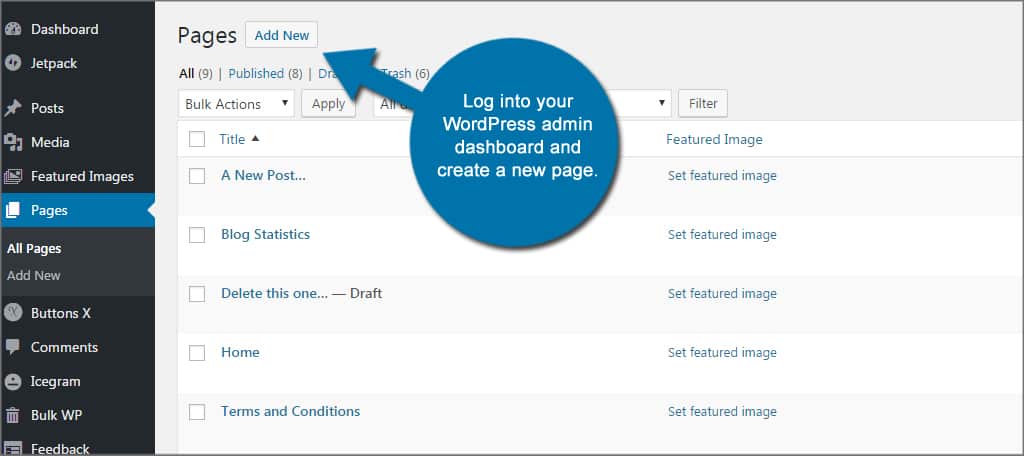
Step 5: Log In to WordPress Site and Add a Page
Log into your WordPress admin dashboard and create a new page. For this tutorial, I am going to simply create a new page to show off the presentation. In reality, you can use this code to create any page or post you want in WordPress.
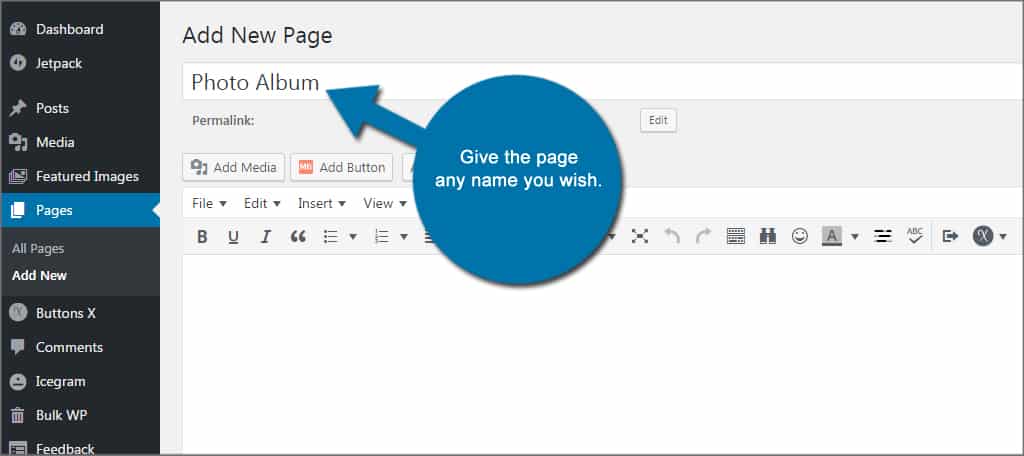
Give the page any name you wish. Since the presentation in this tutorial is a photo album, I’m simply going to label it, “Photo Album.” Of course, this is completely up to how you want to display the slides or accentuate your own posts.
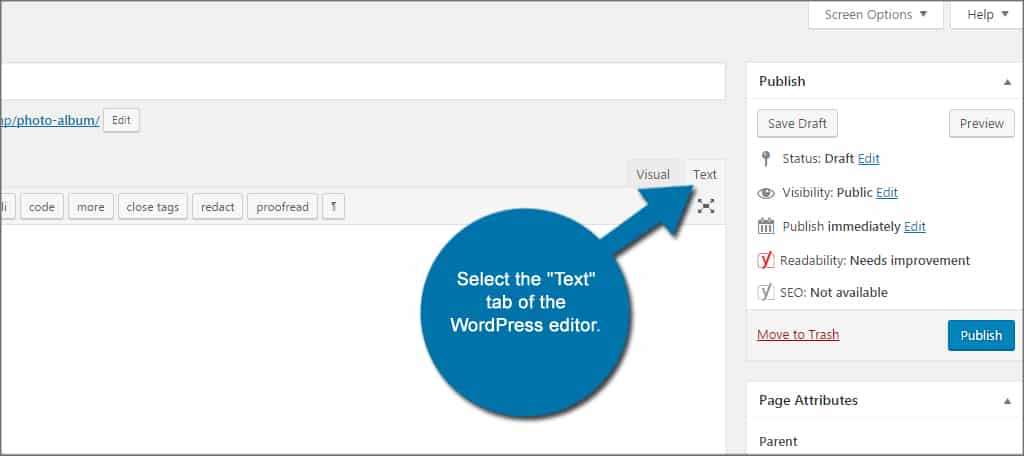
Step 6: Select the “Text” Editor Tab
Select the “Text” tab of the WordPress editor. This tab is where you want to place any coding. In the visual editor, WordPress will modify special characters to avoid accidentally implanting code into the website. Code added to the “Visual” screen will not work unless it is a shortcode for WordPress.
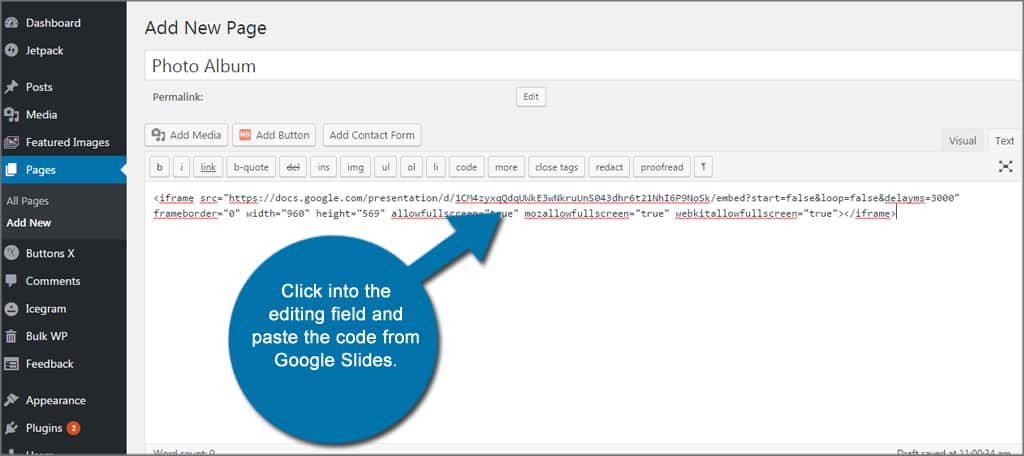
Step 7: Paste Google Slide Presentation Embed Code into Text Editor
Click into the editing field and paste the code from Google Slides.
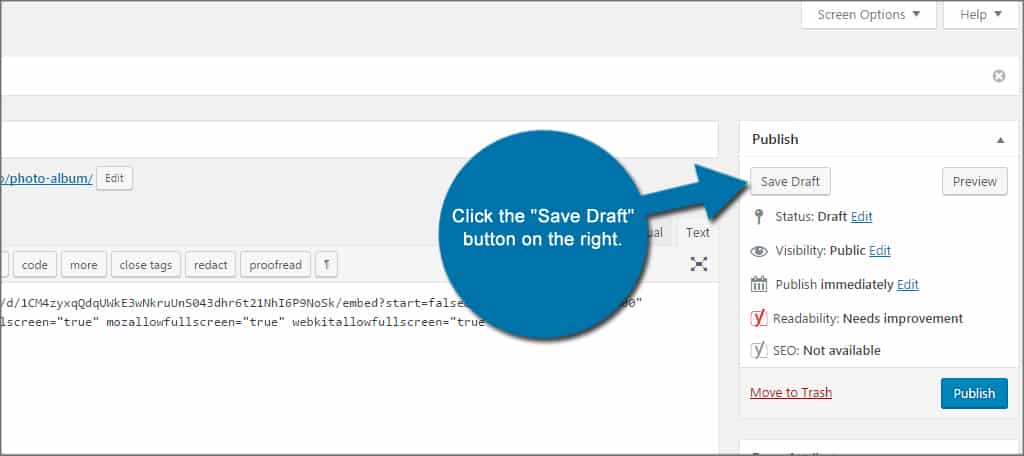
Step 8: Save Draft and View Page
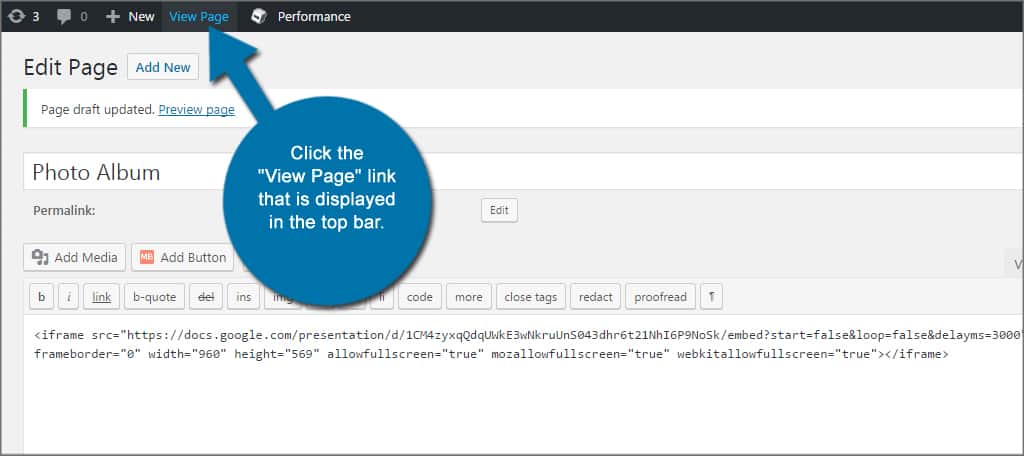
Click the “Save Draft” button on the right. You don’t want to publish it quite yet. Instead, you want to make sure it looks right before setting it live. After all, you might want to make it a different size.
Click the “View Page” link that is displayed in the top bar. This will open the page to show you want the presentation will look like.
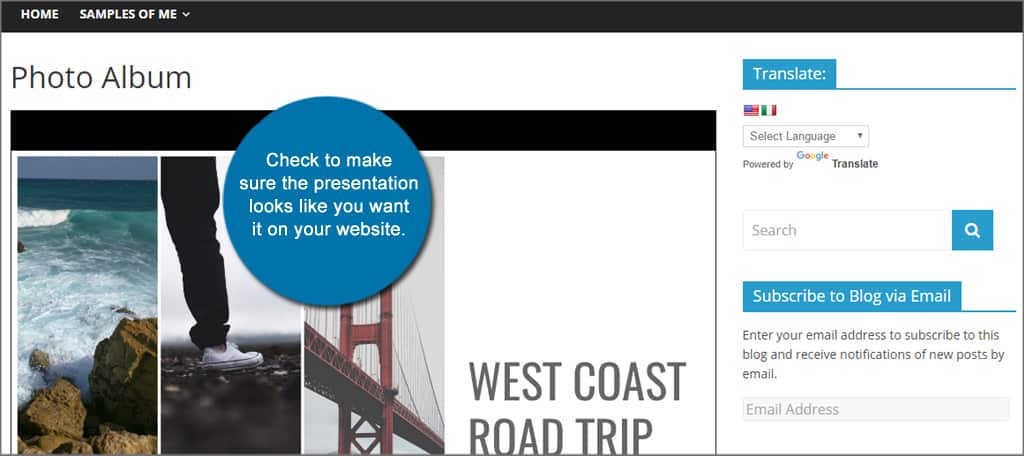
Check to make sure the presentation looks like you want it on your website. If the dimensions are wider than the viewable area, WordPress will automatically shrink it to fit. This means that it will work beautifully on mobile devices.
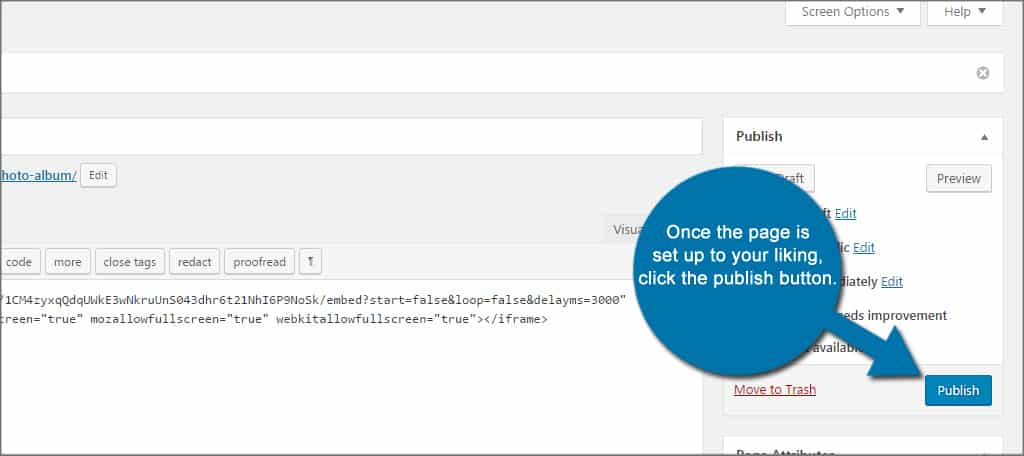
Step 9: Publish the Page
Once the page is set up to your liking, click the publish button.
You now have a fully functional presentation on your site using the Google Slides embed code.
Method 2: Using the Gutenberg Block Editor
In order to properly embed Google Slides into WordPress with the block editor, we are first going to look at a plugin that makes the process simple and easy. Let’s take a quick look at the plugin and see what it does.
EmbedPress
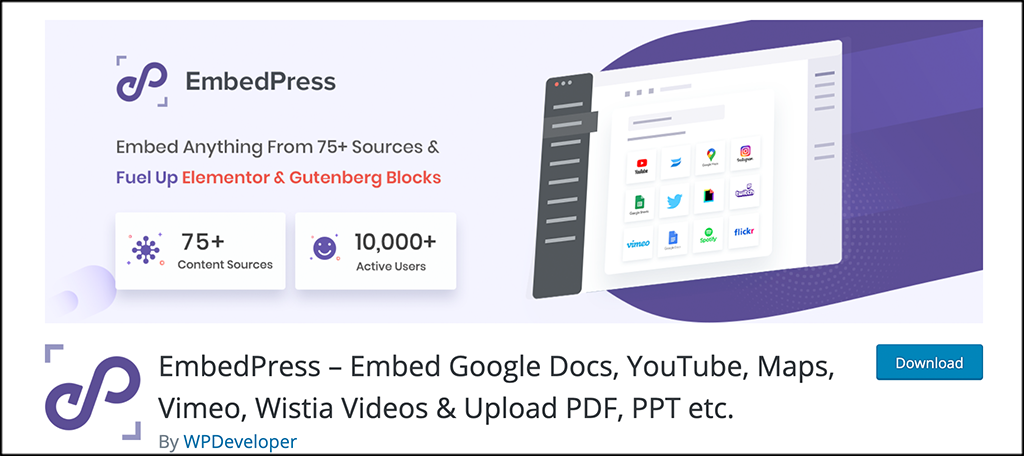
EmbedPress is a plugin that allows you to easily embed videos, images, posts, audio, maps, and upload PDF, DOC, PPT & all other types of content into your WordPress site with one click. The plugin works with both the classic editor and Gutenberg. However, we are going to use it for block editor because it provides a block once activated. You can use that block to easily embed your Google Slides presentation.
Let’s go through the process of getting the plugin installed and then I will show you how to use it.
Step 1: Install and Activate the Plugin
In order to add a Google slide presentation into WordPress using the Gutenberg editor, you first need to install and activate the EmbedPress plugin. You can do this by jumping over to the Plugins page of the WordPress admin dashboard.
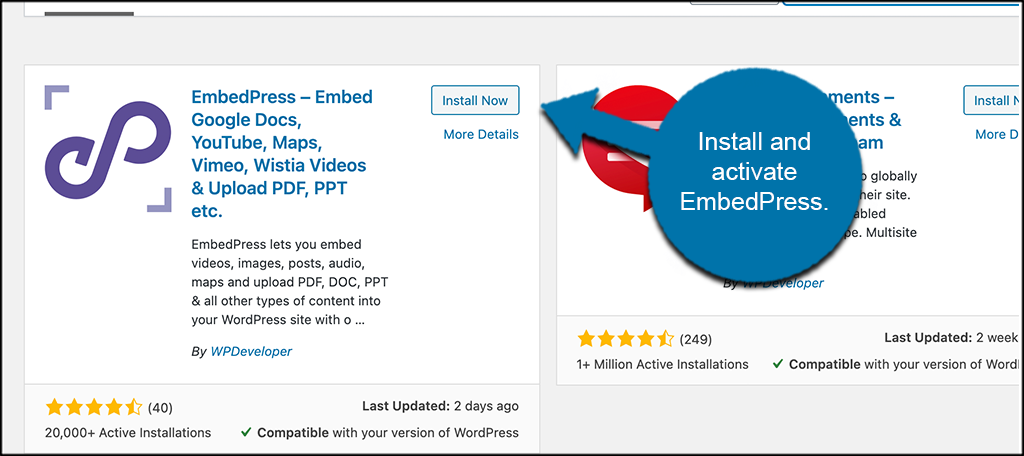
Simply use the available search field and search the plugin by name. Once you see it pop up, install and activate it right from there.
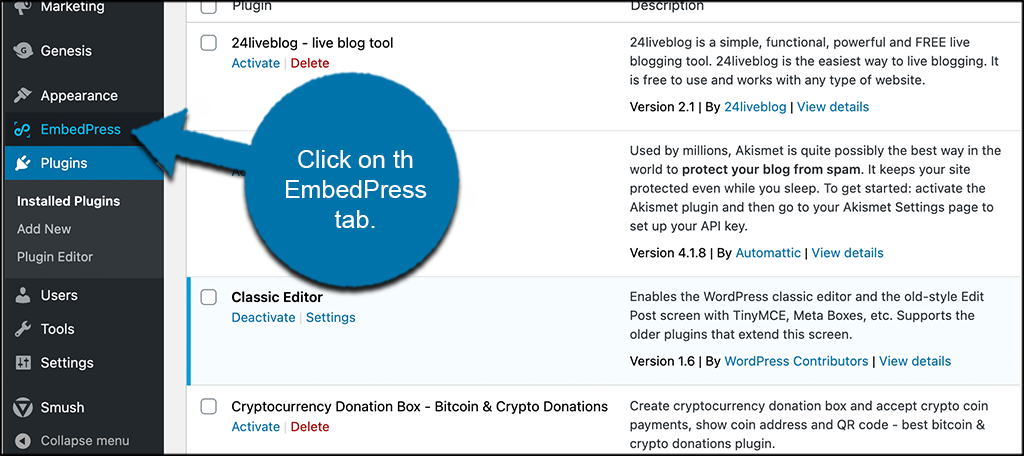
Step 2: Configure Plugin Settings
Now that the plugin is installed and activated, you want to configure a few settings before you actually use it. To do this, click on the “EmbedPress” tab that is located on the left menu area of the dashboard.
You can see this is now an available option since you went ahead and activated the plugin.
This takes you to the main settings page, where you can configure a few settings before using the plugin to embed Google Slide content. Go ahead and configure the settings how you want and click on the “Save Changes” button.

Step 3: Follow Steps 1-5 From Above for Google
At this point, the EmbedPres plugin is ready to roll and you are ready to embed a Google Slide presentation on your WordPress site using the block editor. Follow steps 1-5 from above and get your embed code ready. When you have it, move on to the next step below.
Step 4: Add the EmbedPress Block to Editor
From your page, search for the EmbedPress block that is now available.

When you see it, click on it and add it to your page.
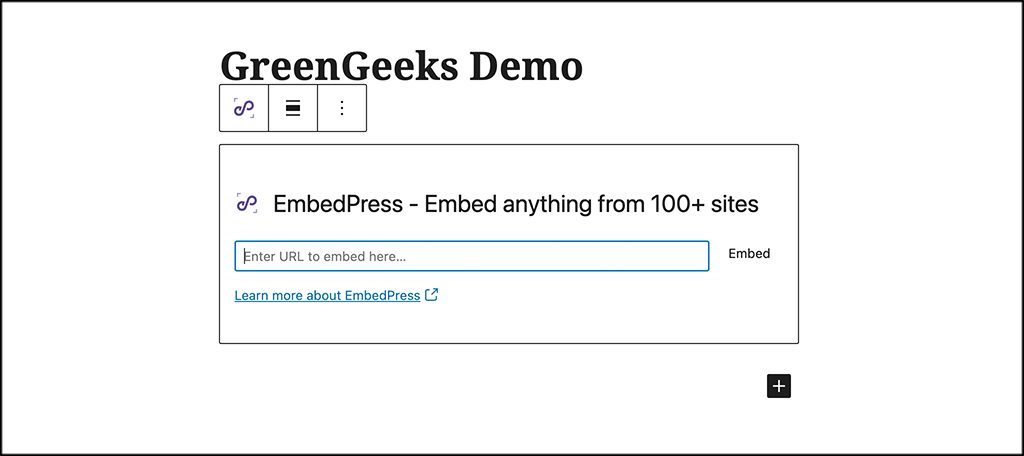
Go ahead and paste your Google Slides embed code into the available field within the block.
Step 5: Save Draft, Preview, and Publish
The embed code you want should now be in the block. You can save the draft and view your page before publishing, just like we did above.
That’s it! You have successfully embedded Google Slides into WordPress using the Gutenberg block editor.
Sharing Your Slideshow
Presentations can have a wide number of benefits for any website. Whether you want to host an automatic webinar for visitors or simply want to share a few facts, Google Slides in WordPress can be helpful. The hardest part about this whole process is designing the presentation of your dreams. Luckily, Google gives you all the tools you’ll need to make such stunning visuals.
What kind of goodies do you integrate into your website to impress visitors? How often do you create presentations to show others on the Internet?