Timelines are often used to show company progression, historical flows, and even the development of apps or programs. They are usually similar to some forms of infographics as you can add a visual appeal to the layout. And it’s easy to add a timeline to your WordPress website.
Adding one gives you an excellent way to visually help visitors identify changes to your website, content, or products. Not only are they good additions to a website, but they can also be great content for sharing progress updates on social media.
In this tutorial, I’ll show you how to add an attractive timeline in WordPress that will help keep your visitors engaged.
Why Use a Timeline in WordPress?
One of the ways to engage your target audience is to provide clarity about your business or purpose. A historical recording of your progress in a timeline offers an attractive way to deliver that information.
Perhaps you want to expand your portfolio by showing your achievements. A timeline can show your progress in an attractive way for those who visit the site. Or perhaps, more importantly, showing progress on a current addition to a website.
For example, let’s say you’ve been working on a highly requested feature for your website. You can actually use a timeline as an announcement, or at the very least include it in the actual announcement post.
Do you have products or services planned for the future? If so, a display showing future events helps keep potential customers involved and informed.
In reality, the possibilities of what a website can do with a timeline are nearly endless.
How to Add A Timeline to Your WordPress Website
Step 1: Install Cool Timeline
The Cool Timeline plugin is a great choice. It allows you to create a highly customizable timeline that can match the style of any website. Each point in the timeline can include a date, image, video, slider, and description.
It’s also worth highlighting how easy it is to use. Everything is done directly in the Gutenberg editor via the Cool Timeline block. All you need to do is add the information to each point and you are good to go.
So let’s get started by covering the installation process.
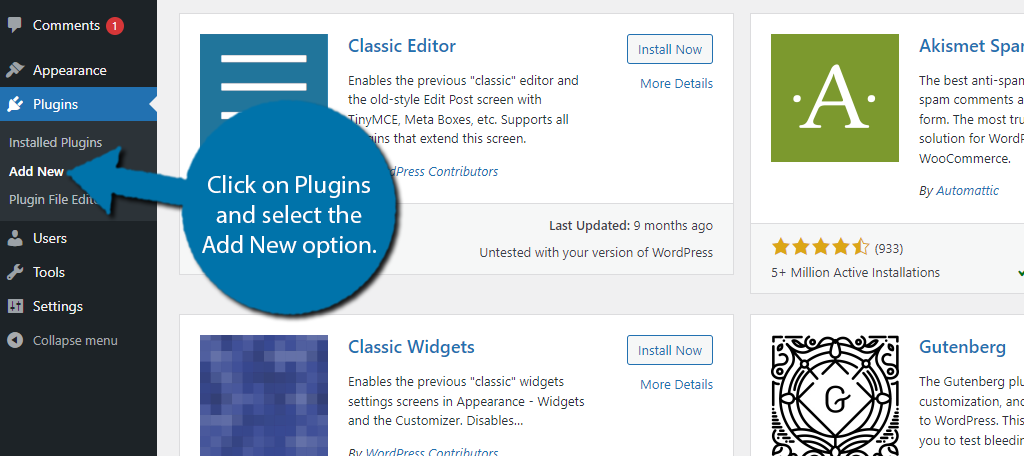
Click on Plugins and select the Add New option on the left-hand admin panel.
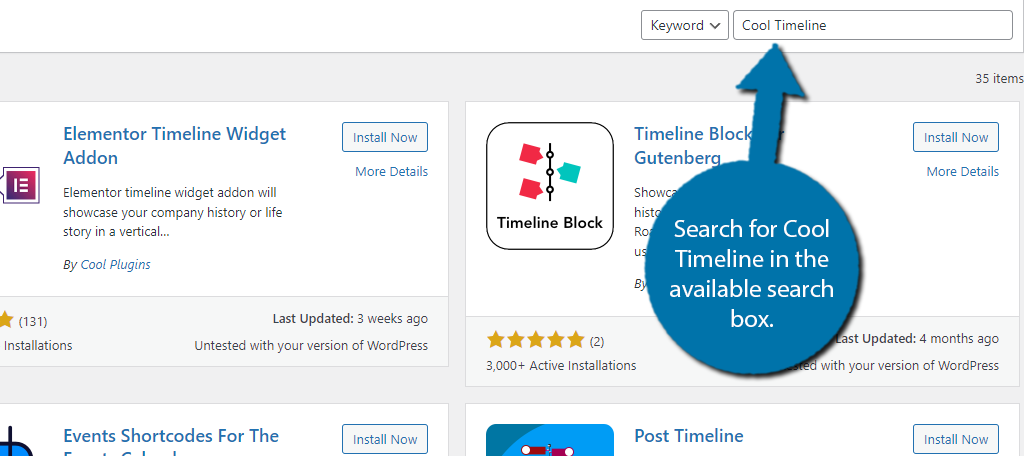
Search for Cool Timeline in the available search box. This will pull up additional plugins that you may find helpful.
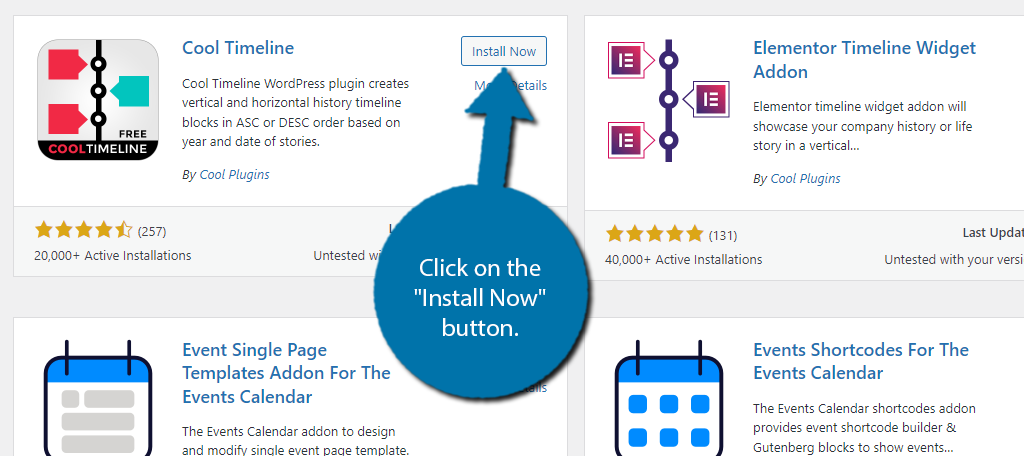
Scroll down until you find the Cool Timeline plugin and click on the “Install Now” button and activate the plugin for use.
Step 2: Configure the Settings
While you can configure most of the settings using a block, let’s start with the dedicated settings section the plugin provides. This won’t take very long as they just consist of some basic style changes (font, color, etc.).
Click on Timeline Addons and select the Timeline Settings option.
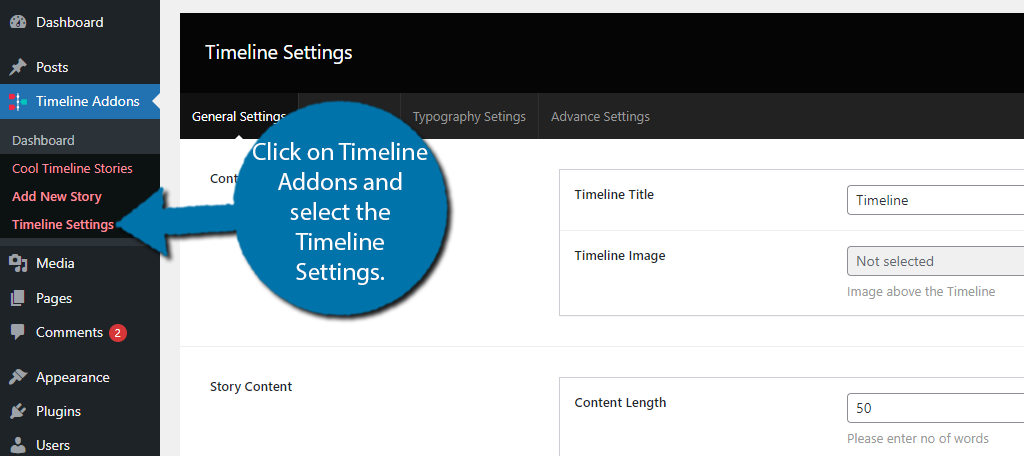
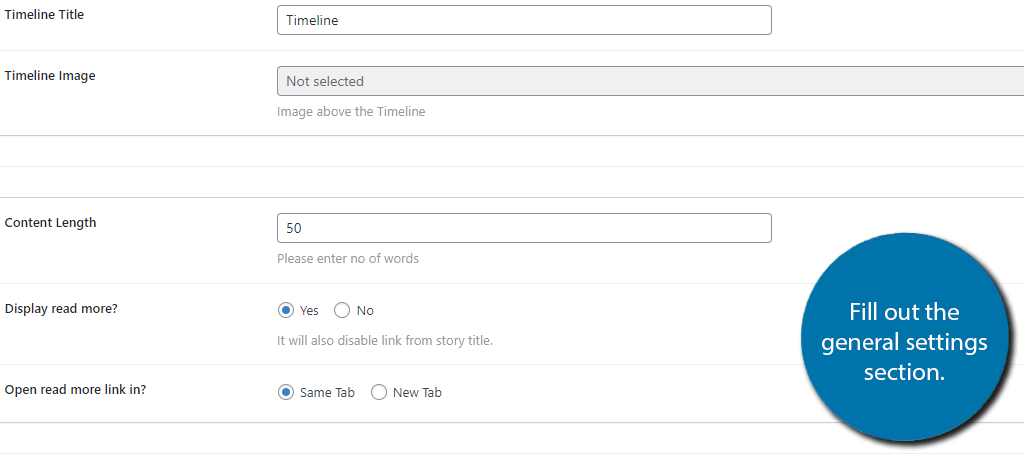
You’ll begin with the General Settings section, which consists of options that determine some basic timeline settings. This includes the title of the timeline, the content length, a read more option, and a year label.
Select the options that best suit your needs.
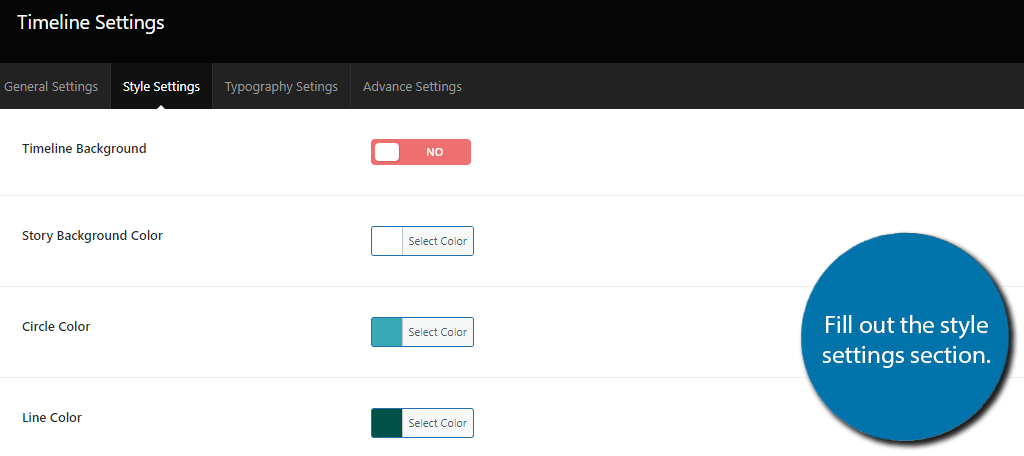
If you click on the Style Settings tab, you will find options to change the color of every element within the plugin. There is also a text box where you can enter custom CSS to get more options.
The only issue in this section is that you cannot see the changes as you make them, thus, you might want to hold off until you create a timeline. Then you can come back customize the colors, and check the timeline to see the changes.
That said, if you have a good understanding of the plugin, feel free to customize the colors now.
The Typography settings deal with all things font-related. Here, you can choose the font family, style, alignment, and more. Similar to the other sections, pick the options that best suit you.
And finally, the Advanced settings, are not actually settings. They are just listing the differences between the free and paid version of the plugin. Feel free to skip to ignore it.
Step 3: Create A Timeline
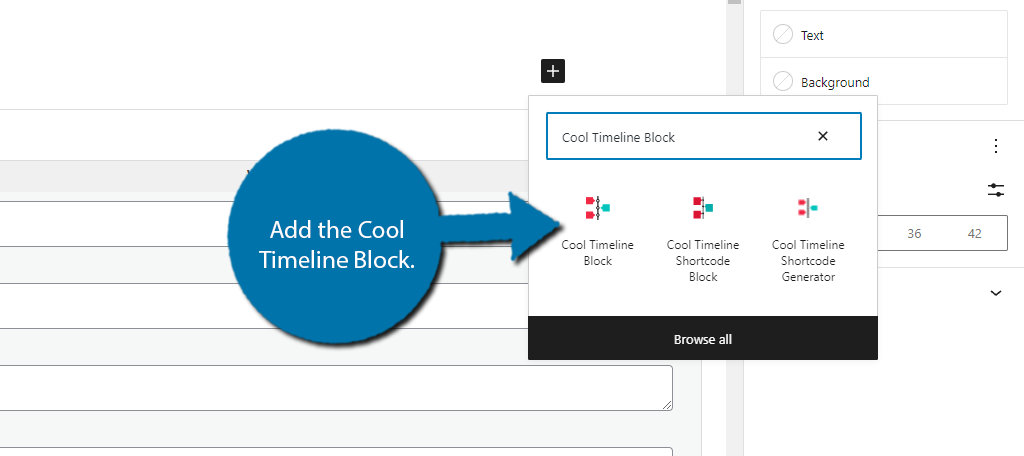
With that out of the way, let’s get into the actual timeline creation. As I said earlier, this is done via the Cool Timeline Block, so you can do it from the Gutenberg editor. Overall, it’s pretty straightforward, so let’s get into it.
Go to any post or page and add the Cool Timeline Block.
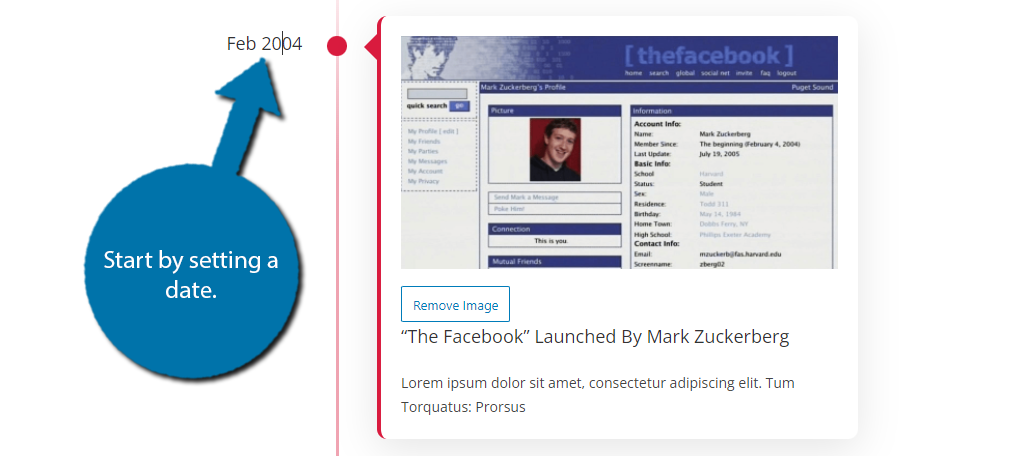
A sample timeline will appear on your post or page. All you need to do is click on the element you want to edit and do so. So, let’s work on changing the elements on the first date.
Begin by clicking on the date and insert your own.
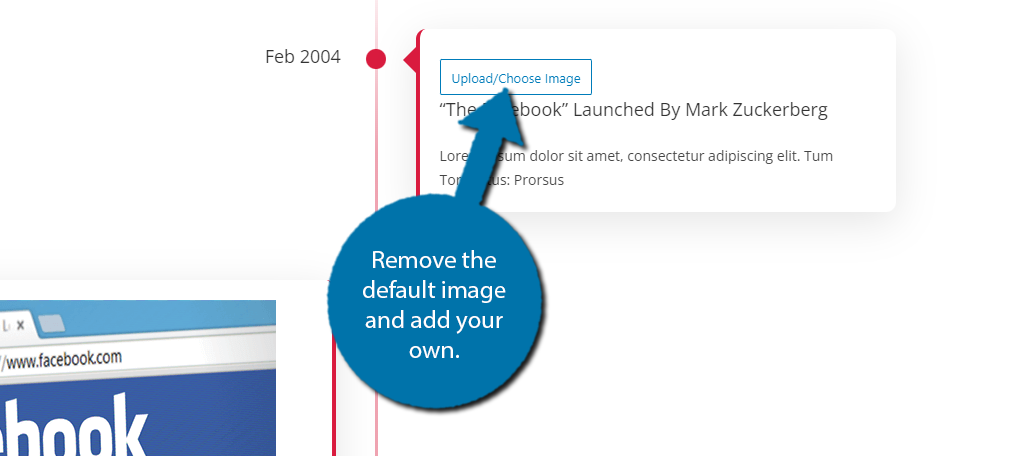
Click on the “Remove Image” button to remove the default image. Then, click on the “Upload/Choose Image” button to add the image you want to use.
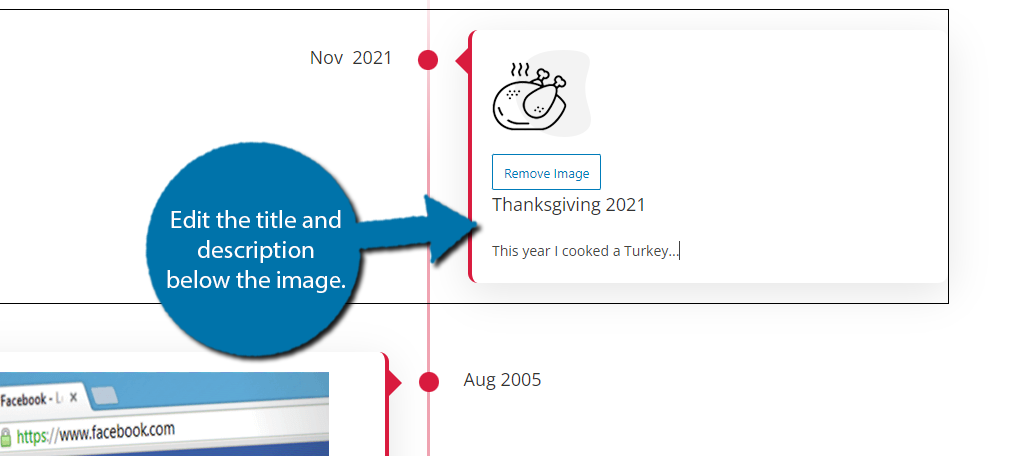
Edit the title and description below the image.
And that really covers editing the timeline. By default, there are four sample items you can modify. You can add more by clicking the “Add Story” button at the bottom of the block.

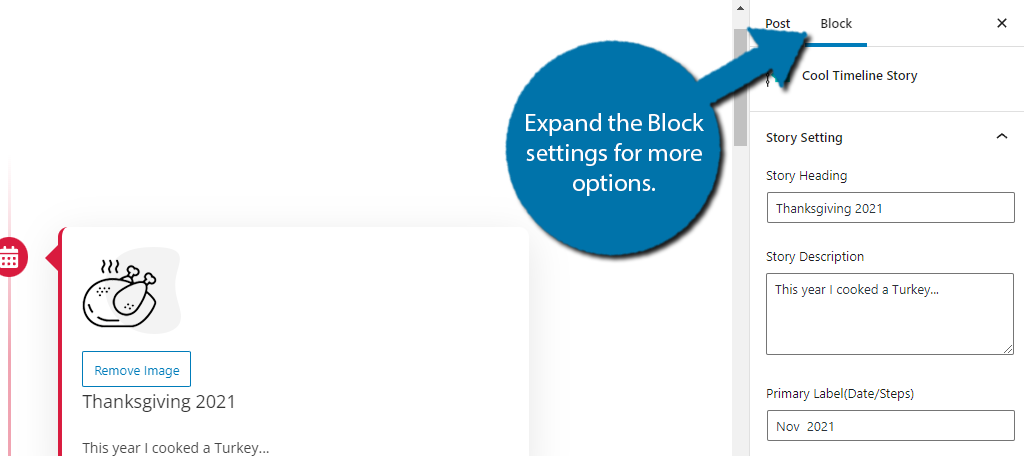
You can also find more options by expanding the block settings. Here, you can change which side of the timeline an event is on, choose the size of the image, customize the dot icon for each event, and more.
Once you are done, just save the changes and publish the post or page. The timeline will look identical to how it looks in the editor. Congratulations on learning how to add a timeline to your WordPress website.
Other Plugins to Create a Timeline in WordPress
WordPress is full of a lot of great plugins, and for all of your needs, there are multiple options available. Creating a timeline is no different. There are plenty of amazing timeline plugins to choose from.
Here are a few alternative plugins to consider using:
Timeline Widget For Elementor
If you are one of the millions of developers that used Elementor to build their website, you should know that there is a timeline widget add-on for Elementor. Timeline Widget For Elementor is perfect for the job.
Fun fact, this is actually from the same makers as the Cool Timeline plugin and works reasonably similarly to the above plugin, with the only difference being that it is a widget for Elementor.
Timeline Express
Timeline Express is another amazing timeline plugin for WordPress. This one focuses on animated vertical timelines. Creating the timelines is pretty straightforward and you can add both text and images to the timeline event.
Placing it is equally easy. You can either place it by using the dedicated Gutenberg block or alternatively, by adding the shortcode to the desired location. All in all, it’s a great alternative plugin to consider.
Timeline and History Slider
If you plan to show off the history of your website, there is no better plugin than the Timeline and History Slider. This plugin allows you to build a timeline for your website’s history either using a vertical or horizontal view.
You can use either a customizable shortcode to place the timeline or use the dedicated Gutenberg block. Either will have the same impact making it a rather easy plugin to use.
Can I Add This As A Widget?
Absolutely!
With the changes to the widget section in WordPress 6, all blocks can be used as a widget. Thus, the Cool Timeline block can work in the sidebar with ease.
However, you need to pay special attention to the image size and the amount of text you use.
It can look really bad if there is too much in each item or the timeline is too long. Luckily, there is an alternative if you use Elementor.
Add A Timeline to Your WordPress Website Today
Timelines are very useful when delivering a flow process or historical record. And because each announcement can hold content much like any WordPress post, you can add even more details to engage the audience.
It’s just one of many ways you can use WordPress to create a stunning piece of online real estate. That said, you should make sure that there is enough content to warrant a timeline. For instance, does a two-item timeline really need to exist?
Probably not. And finding the perfect length of a timeline really depends on how you use it, so always keep that in mind.
How would you use a timeline on your website? Do you find adding things like this increases visitor retention and interaction?