There are a lot of things that WordPress does really well. That is why it is the biggest website builder in the world. However, one of the things it does not do by default is to provide a customized dashboard. This is something you have to do yourself. Today, I will show you exactly how to do this using the Ultimate Dashboard plugin.
In order to customize a WordPress dashboard, you need some outside help from a plugin. Now, you could try to do this all on your own and custom code a bunch of portals and other customizable options. However, using a smooth plugin that offers plenty of selections is a much easier way to go about this.
What is the WordPress Dashboard?
The WordPress dashboard is what you see when you log in to the back of your WordPress website. While there are different ways of logging into a site based on your setup, the most popular way is to go directly to the admin page. You can access the WordPress dashboard by going to:
[ht_message mstyle=”info” title=”” show_icon=”” id=”” class=”” style=”” ]yoursite.com/wp-admin [/ht_message]
When you get there, you will see the admin login. And when you log in, you can see the entire WordPress admin dashboard. I bet you didn’t know that there was a WordPress dashboard plugin available that will allow you to fully customize your entire dashboard.
You will be able to use it to customize anything from the login page to any visible portal. This makes things easier to see, understand, and puts you in full control of the styling and information that is presented to you when you log in to your WordPress website.
Let’s take a look at the plugin in question and see what all it has to offer.
Ultimate Dashboard
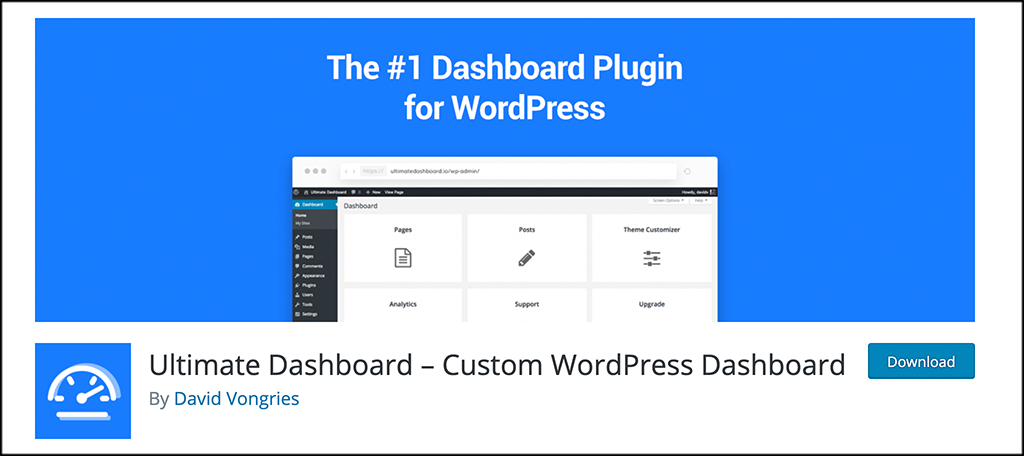
Ultimate Dashboard is a plugin that will allow you to fully customize your WordPress dashboard. Not only will this present you with a more appealing look and feel for personal use, but it allows you to create custom layouts for your clients as well. This means that after you build the dashboard for them, it will have a more personal and branded feel.
The plugin comes with a ton of options and functionality. However, it is built lightweight, so it will not slow your website down when you use it. Once you have activated the plugin, you will be able to easily replace any of the default dashboard widgets with the widgets you choose, giving a more custom feel and look to the entire site.
The Ultimate Dashboard plugin really does come packed full of features. Some of the more popular ones you will have access to upon installation include:
- Ability to Remove Dashboard Widgets
- Create Your Own Widgets
- Customize the Login Page
- Clean Up the WordPress Admin Area
- Add Custom CSS
- Create Custom Admin Pages
- Replace the WordPress Dashboard Headline
- Hide WordPress Admin Bar
- Export and Import Dashboard Widgets and Settings
- Define Colors and Layouts
If you are looking for a way to customize your dashboard or the dashboards of clients, then Ultimate Dashboard is definitely a plugin you want to look into.
Let’s get the plugin installed and running so that you can start a WordPress customization of the dashboard.
Note: There is a pro version of this plugin available. It gives you more freedom and control over the widgets, adds more white-label features, and also provides some extra tools. If this is something you feel you need, then go ahead and check it out The tutorial below is based on the free version of this plugin.
How to Create a Custom Dashboard in WordPress
Step 1: Install and Activate the Plugin
Before you can start customizing the WordPress dashboard, you first need to install and activate the Ultimate Dashboard plugin. You can do this quickly and easily by heading over to the Plugins page in the WordPress admin dashboard.
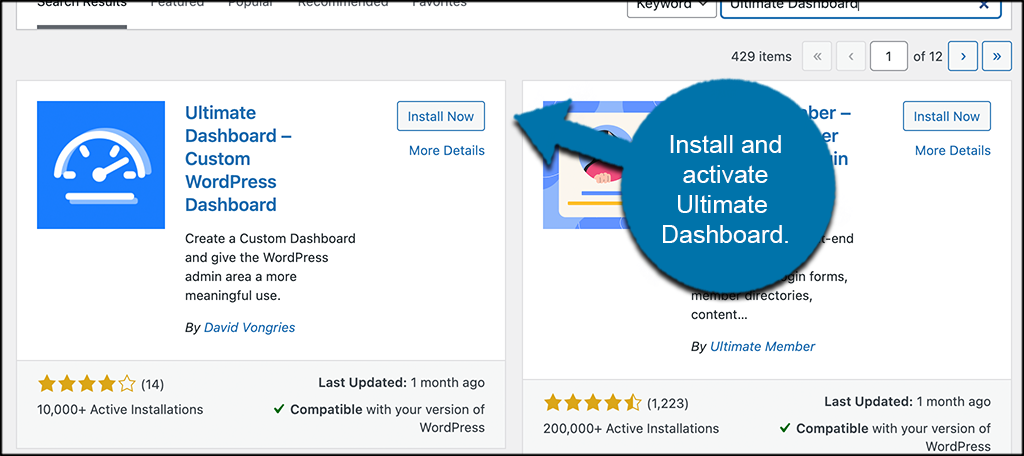
Simply use the available search field that is above the plugins list and search the plugin by name. Once you see it pop up, go ahead and install and activate it right from there.
Step 2: Access the Settings Page
Before we start customizing the WordPress dashboard, you want to go ahead and configure the plugin settings how you want them. These are the universal settings that you can apply to the plugin before you start anything else.
To access them, click on Ultimate Dashboard > Settings, located on the left side menu area of the dashboard.
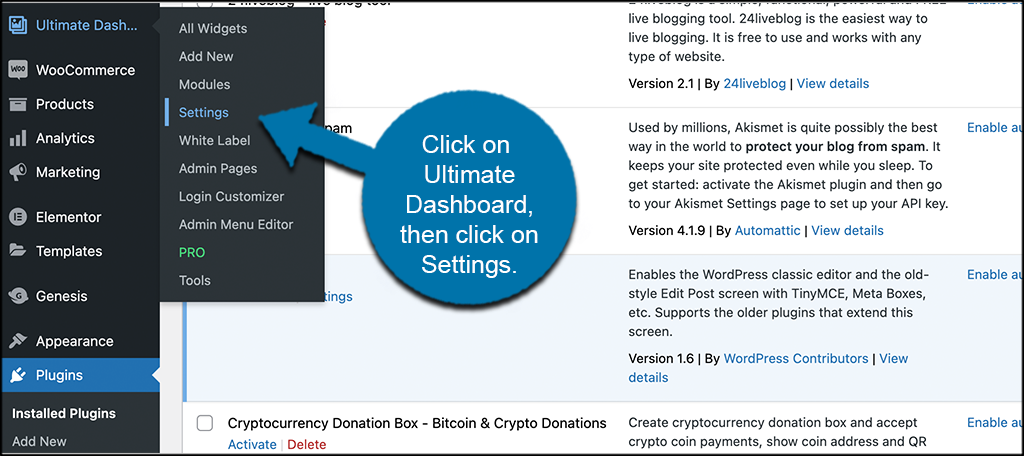
You can see that these and other options are now available because you have activated the plugin for use.
Step 3: Configure the Plugin Settings
At this point, you are on the main settings page for the plugin. Let’s go ahead and configure the settings together.
On the top portion of the page, you will see a couple of sections titled WordPress Dashboard Widgets and 3rd Party Widgets. Go ahead and remove any of the widgets showing that you would like.
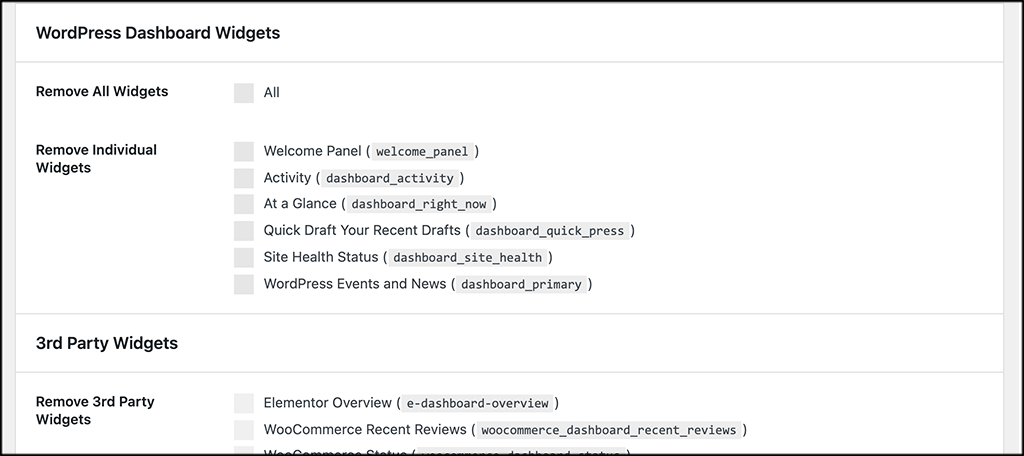
Note: The widgets showing will be based on plugins and other settings you have running on your site. So the list you see will probably be different than the one above.
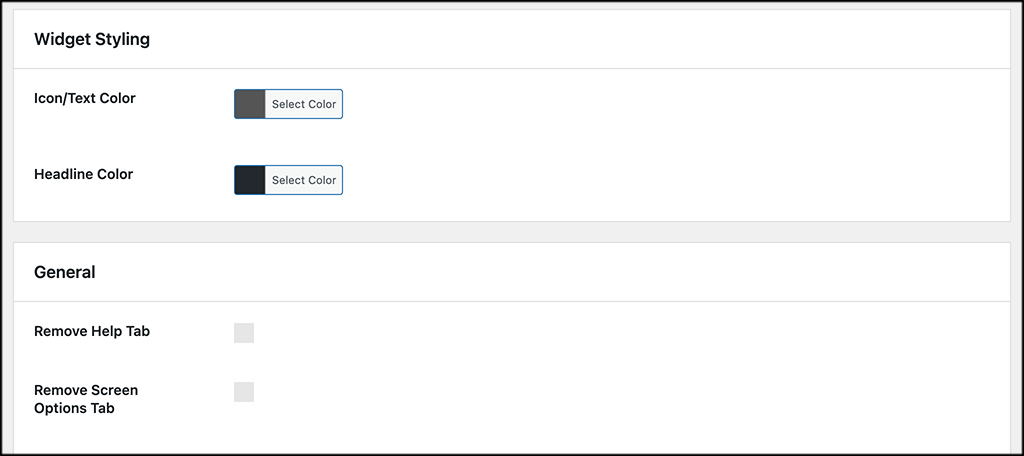
Now scroll down some and you will see the Widget Styling and General section. Go ahead and configure these how you would like as well.
Scrolling down a little more and you will find the Custom CSS section. If you know how to add CSS, then you can do that here.

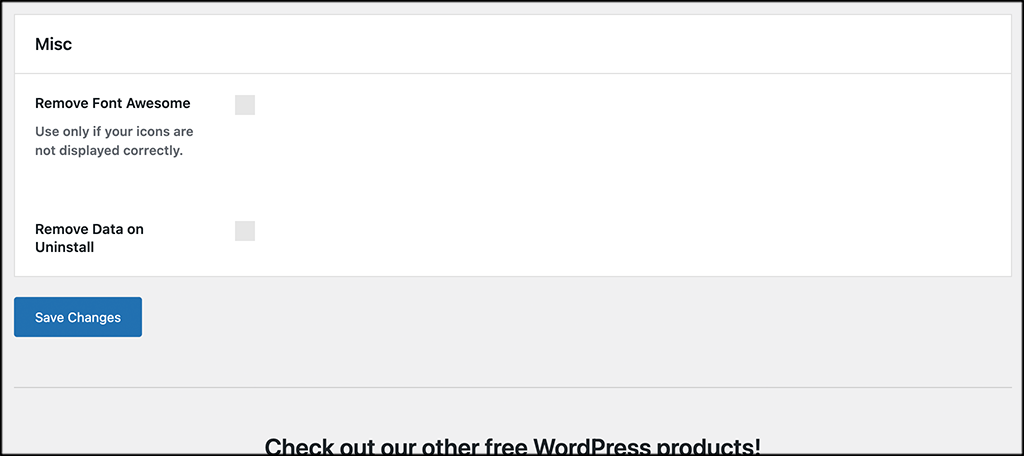
Finally, the bottom of the page has a couple of misc items to deal with. Go ahead and finish that up and click on the “Save Changes” button to apply everything.
Step 4: Choose the Modules You Want
Now that all of your plugin settings have been configured, let’s go over the rest of the features.
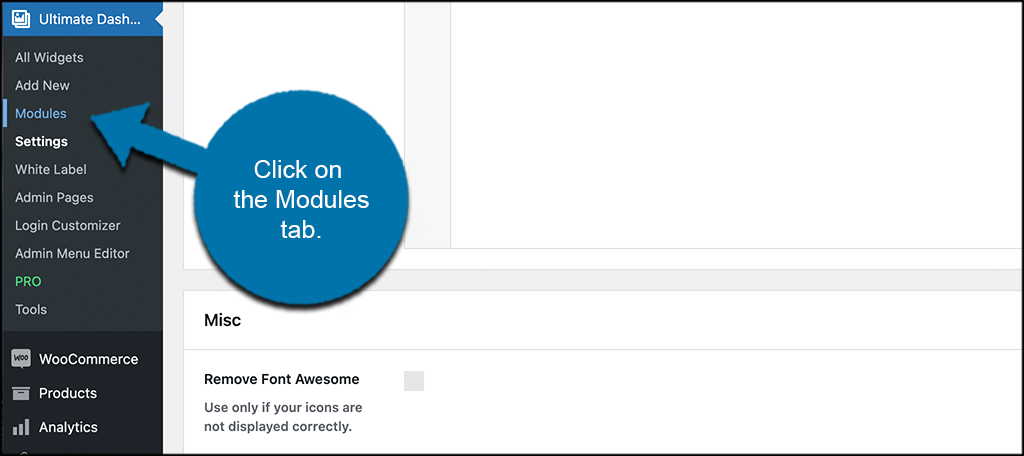
You can now choose the sections you want to have access to from the modules page. Click on ”Modules,” located on the left side menu under the main Ultimate Dashboard tab.
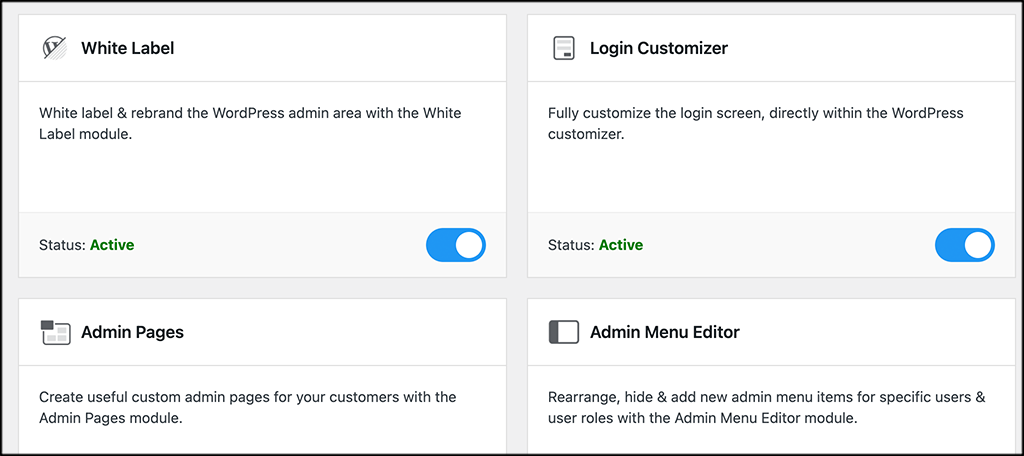
From here, you can activate or deactivate all the modules you want to be able to customize. You can see they are all activated by default.
Step 5: Configure and Style Modules
Now it is time to configure and style the modules you want. On the left side menu area, you will see links to all available modules. Simply click on any of those links and customize each module how you see fit for your site.
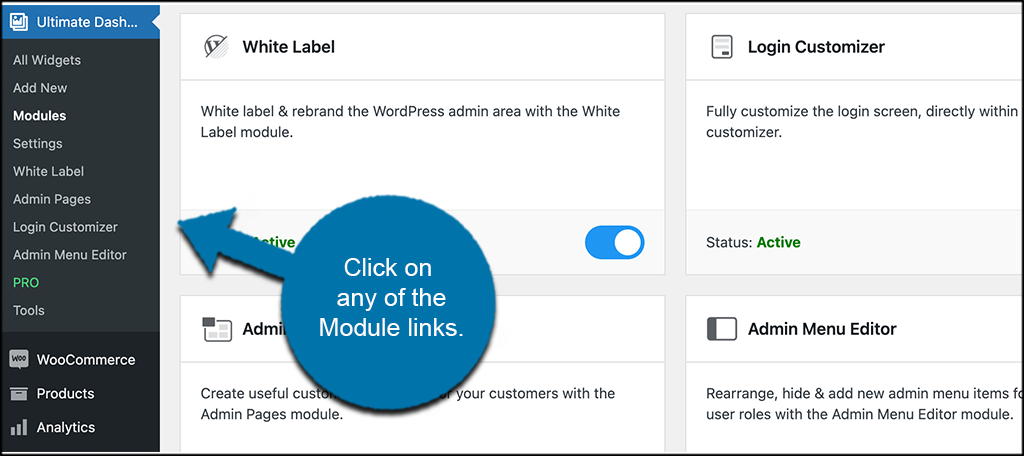
In this case, we are in the “White Label” module. You can see that there are available settings to configure for this particular module. Go ahead and configure all these settings how you want.

Note: You can do the same thing for the other modules. Just click on the module link you want to configure and go for it.
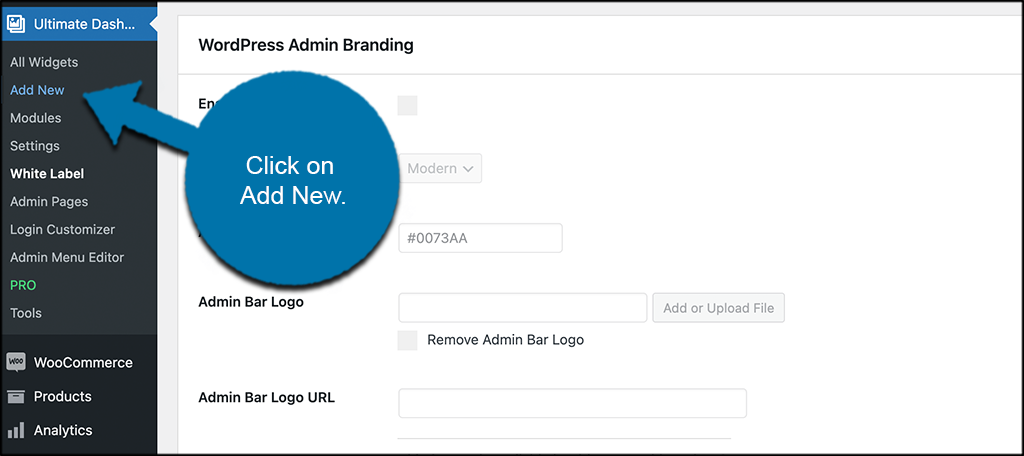
Step 6: Add a Widget
Last, but definitely not least, you can start adding the widgets you want. Click on the “Add New” tab located on the left menu area. Again, you will see this under the main Ultimate Dashboard” link.
When the widget editor opens up, go ahead and add all the relevant widget info needed. This will include:
- Title
- Widget Type
- Icon
- Tooltips
- Links
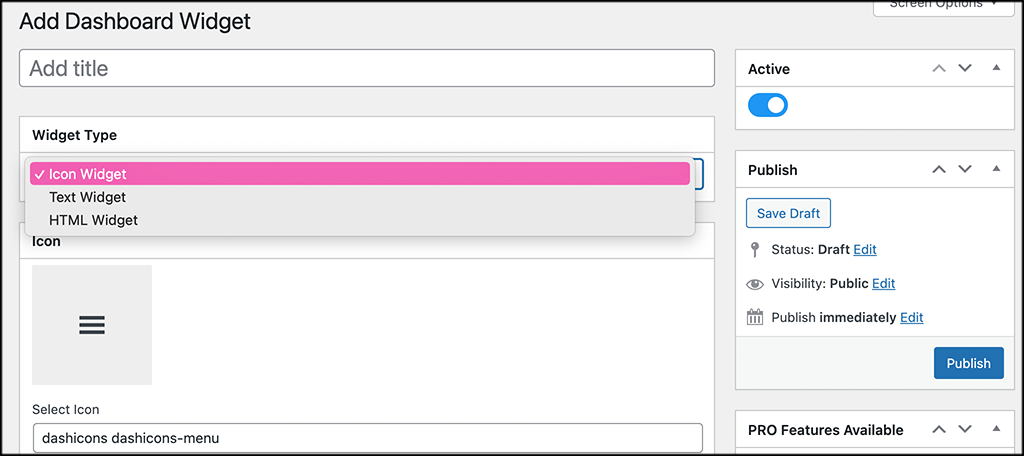
When you are finished adding what you want, publish the widget and it will automatically be availed to place on the admin homepage of the dashboard.
Repeat this step as many times as you want to create as many different, customized, unique dashboard widgets as you want. You will see them available on the main page and you can drag and drop to position them how you want.
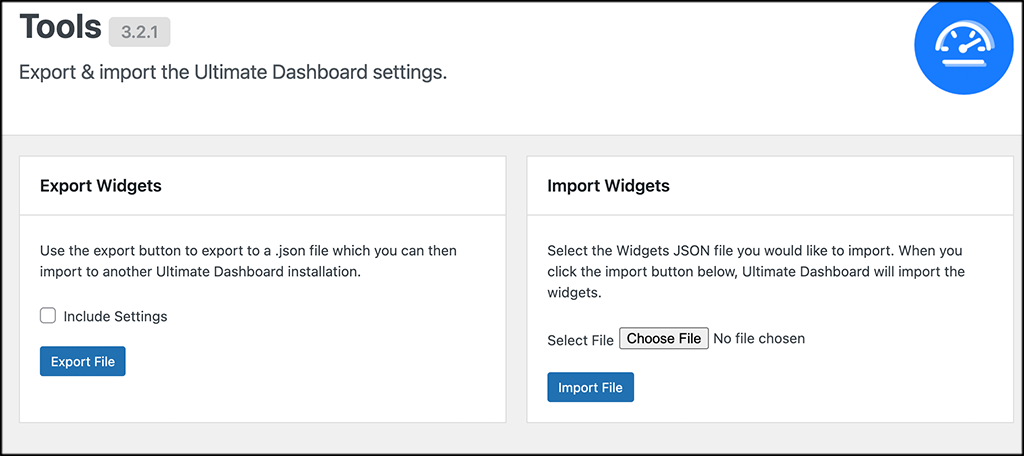
Other Ultimate Dashboard Options
There is also a “Tools” link that you can view. Essentially, this is where you export and import widgets from site to site if you need to do that.
You can also click on the “Pro” tab and view some of the extra features available if you choose to buy the pro version.
Final Thoughts
Having a customized WordPress dashboard makes things so much more personal and enjoyable for both you and the clients you do this for. Instead of the default WordPress dashboard, you are able to customize it to your needs, settings, colors, and branding.
I hope this article was able to show you how easy it is to customize a WordPress dashboard using the Ultimate Dashboard plugin.
Have you found another plugin that works like this one? Do you prefer to just stick with the default WordPress dashboard?