Are you looking for a way to re-order posts in WordPress? Unfortunately, WordPress doesn’t make having a simple method to rearrange posts easy, but that doesn’t mean it doesn’t exist.
To accomplish this without plugins, you would need to change the publish date in WordPress.
However, plugins are the best part of WordPress, and there are multiple that can add this feature. Today, I will demonstrate four ways to rearrange posts in WordPress.
Why Re-Order Posts In WordPress
Of course the big question is why exactly would you want to re-order posts in WordPress and there are a few reasons for its importance.
By default, WordPress displays post content in reverse chronological order. This means that the newest posts will appear first and the oldest ones at the bottom.
In theory, this isn’t a bad system. Most websites will want to push their newest content to visitors. However, all content is not created equal. Sometimes older content will continue to perform better than newer articles, and not having it appear with newer posts will only hurt you.
For this reason, rearranging posts is important.
Method 1: Change Post Publish Date
Let’s begin with the method that does not involve installing a plugin. Remember how I said WordPress uses reverse chronological order to sort posts? Well by changing the publish date to one more recent, the post will be moved up the list.
It’s really easy to do, but can be tedious if you have a large number of posts.
To do this, simply click on any existing post on your website. Click on the “Settings” button and then click on the Publish day link.
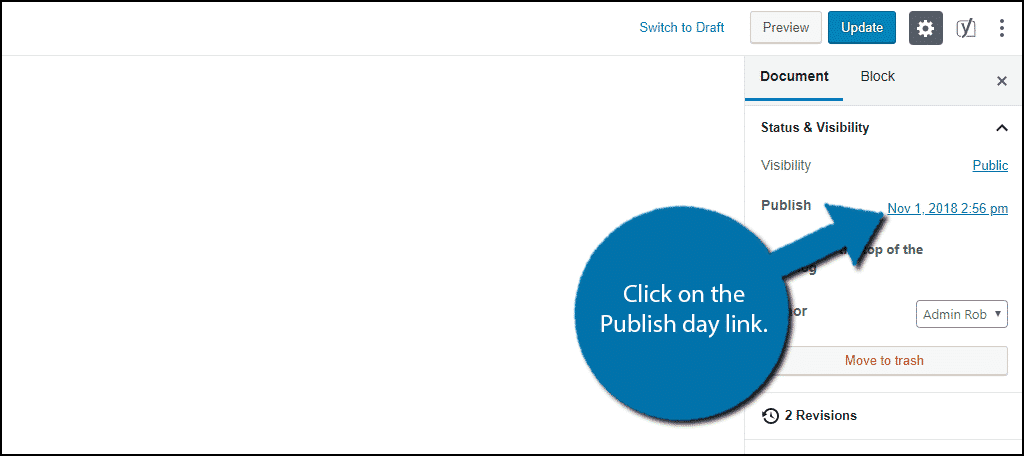
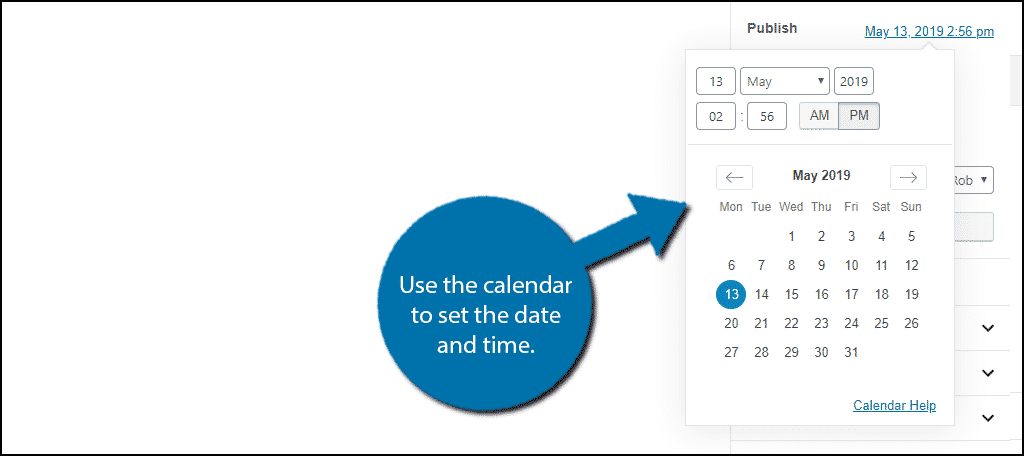
Upon clicking on it, you will see a calendar. Here you can select the day it will be shown as published. The newer it is, the closer to the top of the list it will appear. However, make sure you do not set it to a future date.
This will remove the post from appearing on your website and instead, will schedule it for that day.
Remember to save the changes.
This method is great for websites that do not have a lot of posts. But for those with a lot of content, it is not optimal. It also involves the risk of setting the wrong date and scheduling content instead of displaying it.
Instead, using a plugin is a much better choice.
Method 2: Post Types Order
This is the method I recommend using because it is simply the best option out there. The Post Types Order plugin allows you to click on a post and drag it to the desired position.
This plugin has over 500,000 active installs and for good reason, it works.
To begin, install and activate the plugin. This plugin works after activation, but you may want to change the settings.
Click on Settings and select the Post Types Order option.
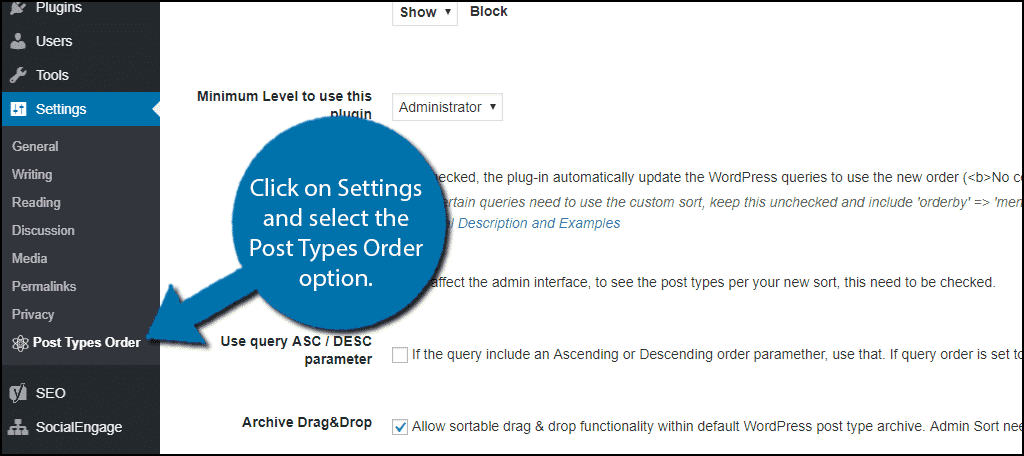
Here, you can change the various settings the plugin offers. For example, you can select which user roles can re-order posts in WordPress. Just remember to save any changes you make.
However, you can skip this step since it is ready after activation for most users.
Click on Posts and select the All Posts option.
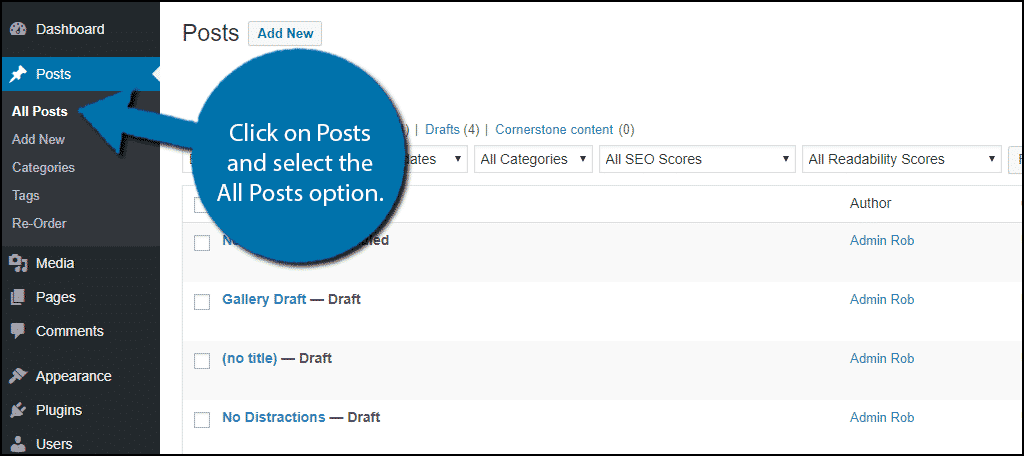
You will now see a full list of your posts like normal. However, the difference now is that you can now click on a post and drag it to the desired location.
This is much faster than going into each post individually and changing the publish date. However, there are other plugins to consider.
Method 3: Reorder Posts
Reorder Posts is another great option that utilizes the drag and drop method but is different from the previous plugin. Unlike the last plugin, where you can still see drafts and scheduled content, this plugin adds a Reorder section to posts.
Here, you can only view published content and rearrange it any way you want.
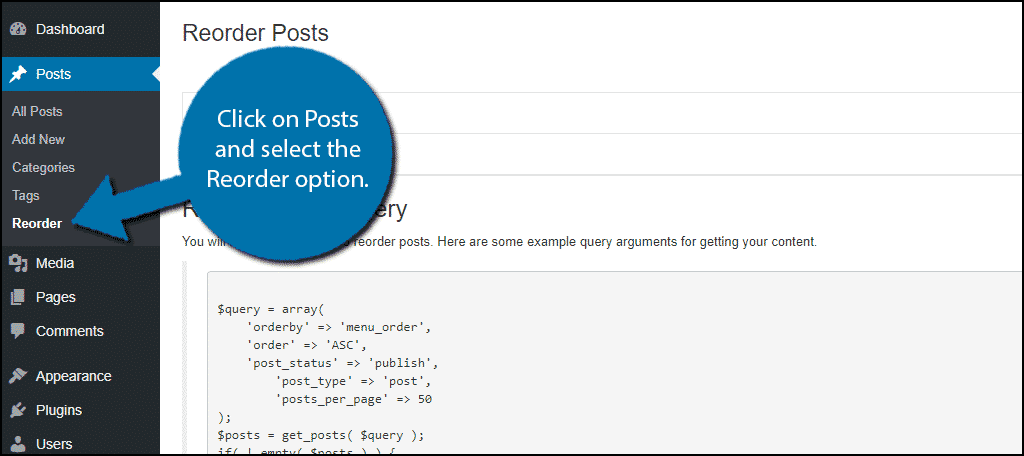
Let’s begin by installing and activating the plugin. Then, click on Posts and select the Reorder option.
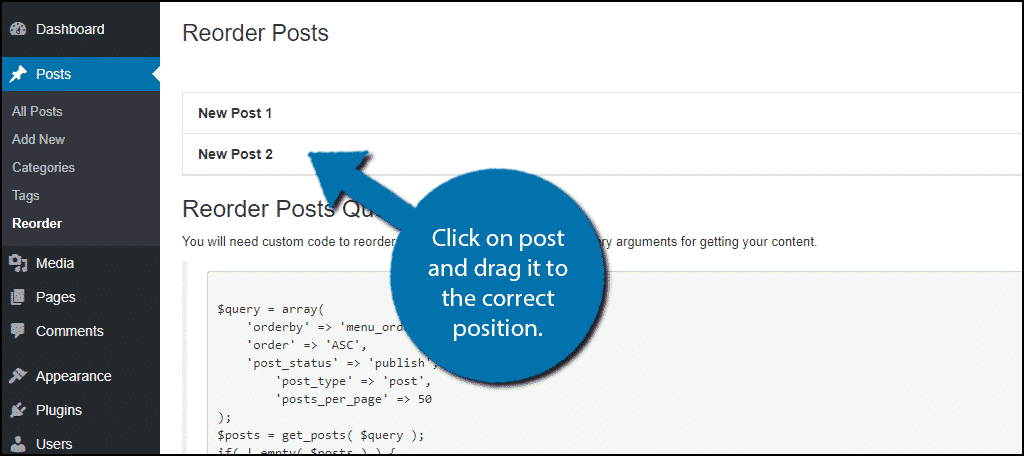
At the top, you will see all of your published posts. Simply click on the post and drag it to the desired location.
Either of these plugins should be more than enough to fix your problems, but there is one more technique that may better suit your needs.
Method 4: Sticky Posts
Many developers may just want to highlight specific posts for a set amount of time. The sticky post feature allows you to do this without having to re-order posts in WordPress.
To put it simply, you can sticky a post to the front page and make it the most visible post on your website.
This method will not require a plugin since it is a built-in feature.
Open up the post you want to place at the top. Click on the “Settings” button. Check the “Stick to the top of the blog” box.
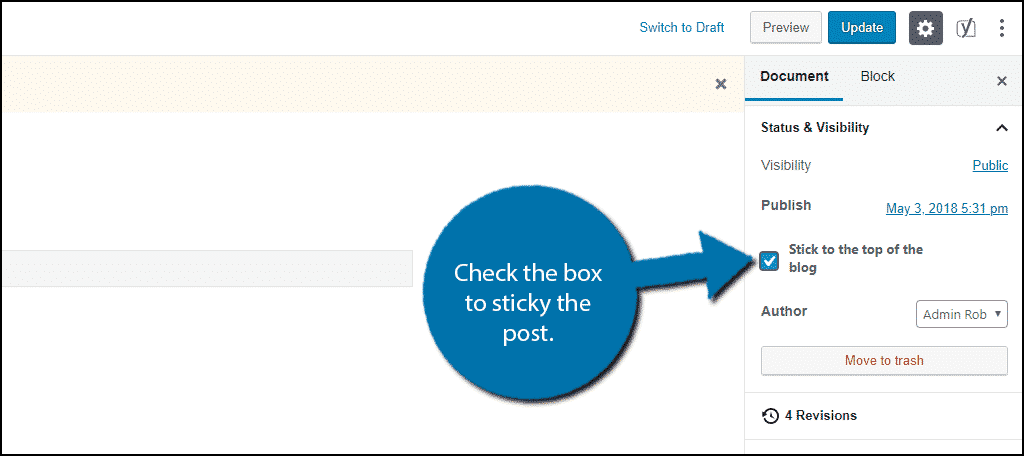
Update the post. The post will now be pinned to the top of your content.
You can sticky multiple posts and can keep track of the material. A sticky post will have “Sticky” attached to the end of its name in the post list.
I would recommend only stickying 3 posts at the most because you still want your new content to get the attention it deserves.
Congratulations! By using any of these methods, you will be able to relocate posts to new positions.
New Posts Need Attention
While it is certainly possible for older posts to perform better than newer ones, your new posts are the future of your website. No website can rely purely on the performance of old content. While they can have great long term performances, new posts are essential to growing.
New posts have a better chance of drawing new visitors and boosting your monthly views.
Which method did you use to rearrange posts in WordPress? Why would you need to re-order posts in WordPress?