Receiving feedback is crucial as a content creator, but unfortunately, the pieces of content you can collect it on are limited by default. However, with the help of a plugin, it is possible to add an Ajax like button to any type of content.
You can use this feedback to create content that is better suited for your particular audience. And thanks to its simplicity, visitors are more likely to click on a like or dislike button than leave a comment.
Today, I will demonstrate how to use the WP ULike plugin to an Ajax like button to any type of content.
The Importance of Feedback
Collecting feedback is a big part of every website. It helps you understand what’s working well for your website and what isn’t.
Some might argue about when collecting feedback is more important, but I can assure you it is always important. Whether you are just starting out as a content creator or if you are a 10 year veteran with insane traffic, collecting feedback is essential for growth.
However, how you choose to collect feedback is even more important.
Very Simple Feedback
In this case, a like and dislike button is one of the simplest forms of feedback collection. It does not provide any specific information about what they liked or didn’t like in your content. It only provides a general opinion.
Thus, if you are looking to collect more specific information, I would recommend adding a poll or sending out a survey to collect more information. Or simply ask visitors to leave feedback in the comments section.
However, the main advantage of the like/dislike button is its simplicity. The simpler and less intrusive information collecting is, often results in more people willing to take part in it and provide real feedback.
Installing WP ULike
The WP ULike button allows you to add an Ajax like button to almost any type of content in WordPress. This includes:
- Posts
- Pages
- Comments
- Activities
- Forum Topics
- WooCommerce Products
And so much more. The best part is that it is done with style. You can customize the appearance of a button to match your website’es design, so there’s no need to worry about it not blending in.
Note: Some of the options for content types are only available in the Pro version.
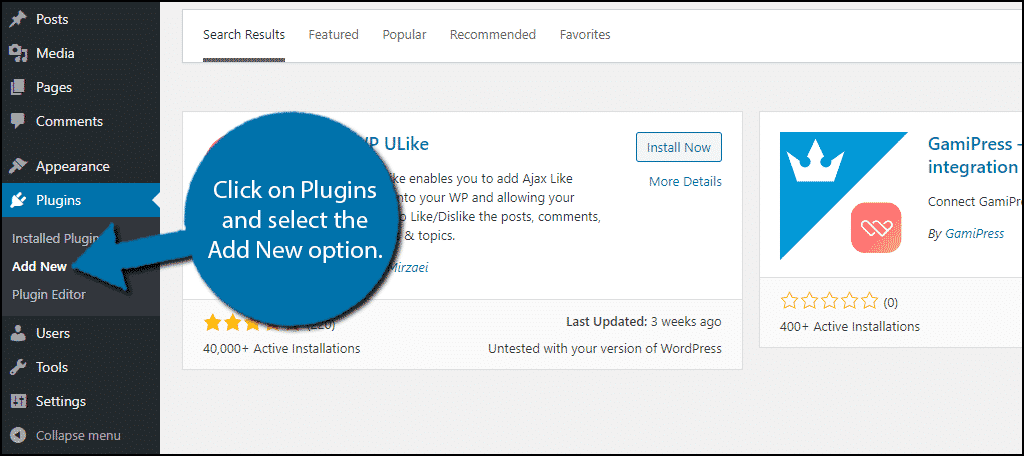
Let’s start by clicking on Plugins and selecting the Add New option on the left-hand admin panel.
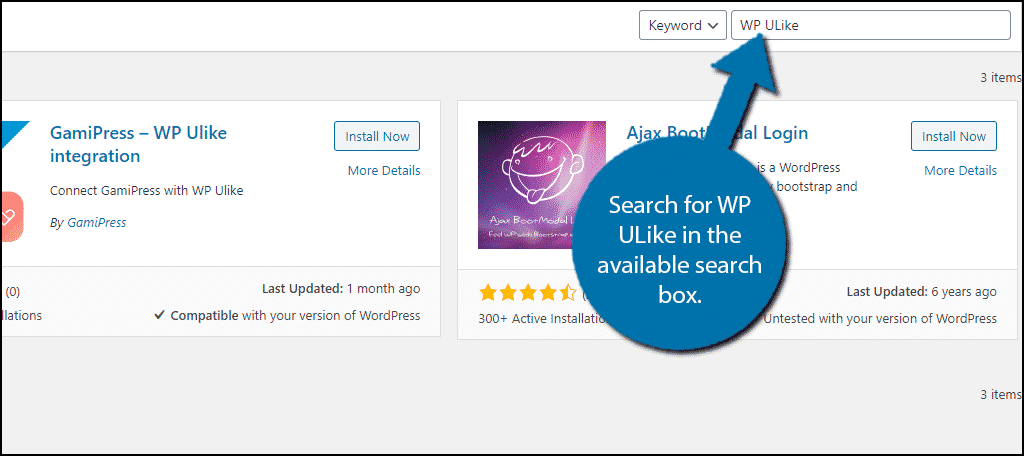
Search for WP ULike in the available search box. This will pull up additional plugins that you may find helpful.
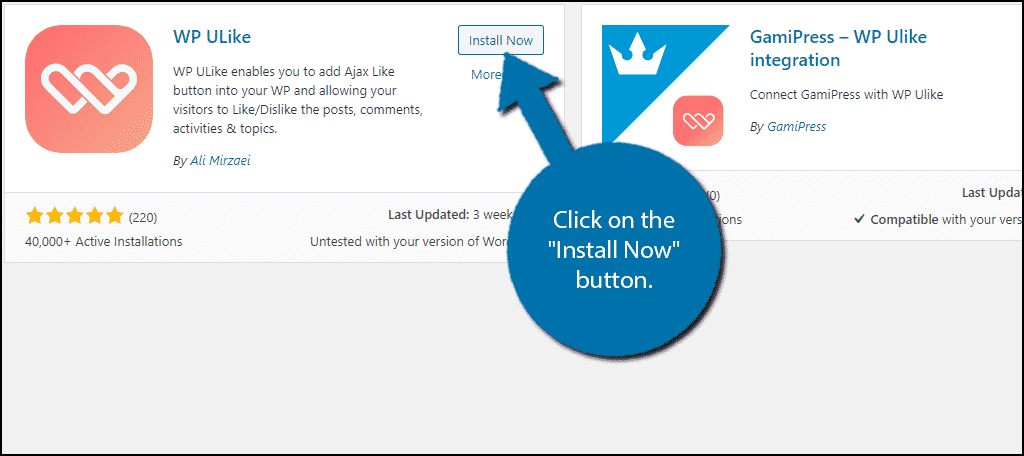
Scroll down until you find the WP ULike plugin and click on the “Install Now” button and activate the plugin for use.
Setting Up WP ULike
The plugin is pretty simple and shouldn’t take more than a few minutes to set up.
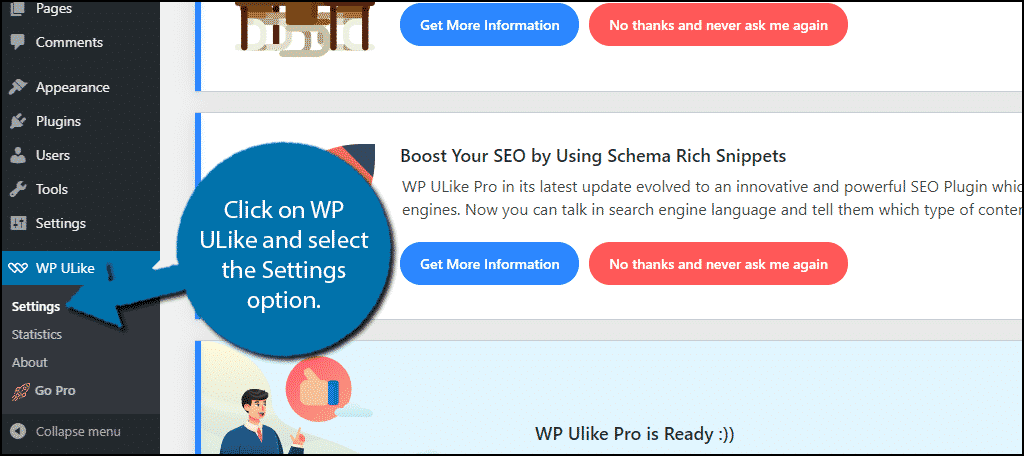
On the left-hand admin panel, click on WP ULike and select the Settings option.
At the top of the page, you will see a few notifications alerting you about some of the features the plugin offers and reminding you that the pro edition exists. Scroll down until you see the actual settings.
The settings consist mostly of switches that you turn on or off, which makes setup really simple.
General Settings
In the general section, you will see some of the basic settings that include:
Like Converter: This changes the format of larger number values. For example, 1000 likes would become 1k. This is off by default.
Enable Notifications Option: This simply displays a notification when a like is left. This is on by default.
Enable Anonymize IP: This feature helps make sure the plugin is compliant with GDPR guidelines. It is off by default.
Note: This will only make sure everything within the plugin is compliant, it will not change any other settings, which means your website could still not be compliant.
Hide Admin Notices: This will make it so that admins will not be notified for every like received. This is off by default, but I recommend turning it on.
Disable Plugin Files: This is the only none switch option. Instead, you can pick specific plugin files via a dropdown list. This list will show plugin files that you do not currently have installed.
Content Types
Content Types are where all of the fun settings are located. Each content type has its own settings that you will have to configure. I will demonstrate how to add a like button to post content.
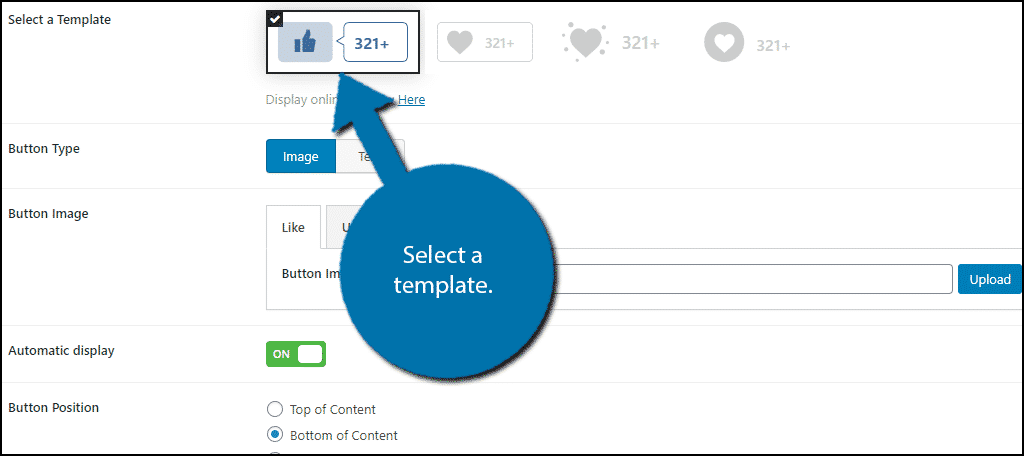
At the top, you can choose between 4 templates of the like button. Pick the one that best suits your website.
Note: There are slight differences depending on the template you choose, but they are very similar.
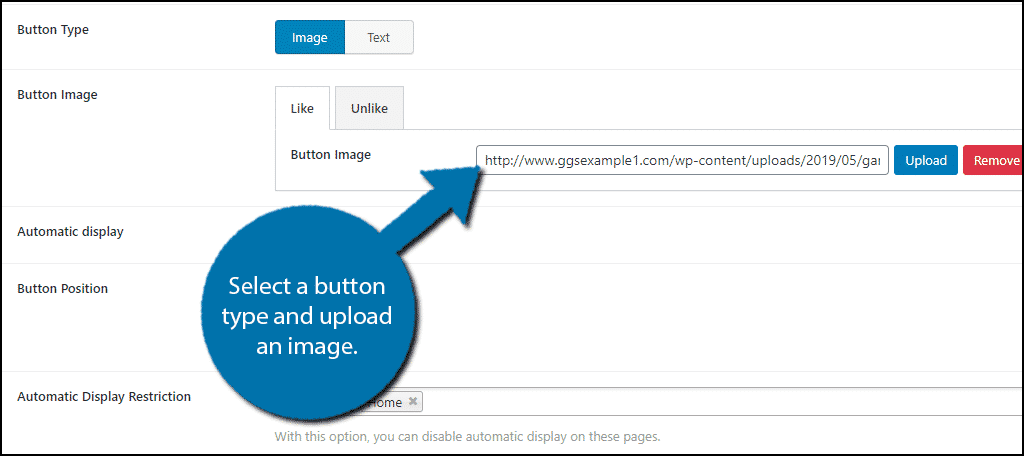
The next option is the Button Type. You can either choose an image or text. This will decide if you are uploading an image or writing code for the Button Image option.
Note: Keep in mind that if you choose to add your own image to the like or dislike button that it is properly sized.
The next option determines the position of the button on the post. You can choose the top, bottom, or both. Pick what’s best for your website.
The Automatic Display Restriction and Post Type Filter help you make sure the buttons are appearing on the post content you want them to.
Underneath this, you will find the Logging Method. This is simply how the information will be sorted for your viewing pleasure. You can choose between Cookie, IP address, or Username. This helps you get a better grasp of who is liking your content and who isn’t.
The final two options are off by default. The first is that only logged in users can see the buttons and to display them. Turning them on is up to you.
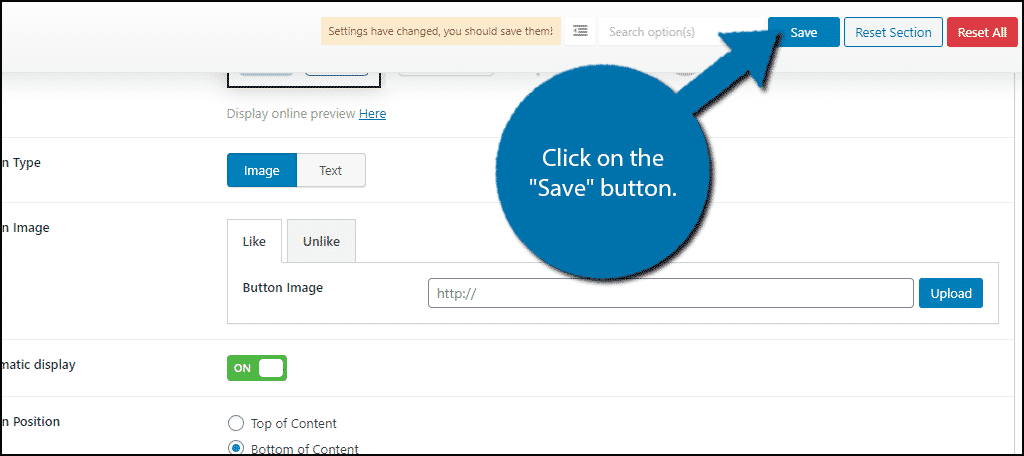
Once all of the settings in the post section have been edited, click on the “Save” button to view.
You can now see your like button on the website.
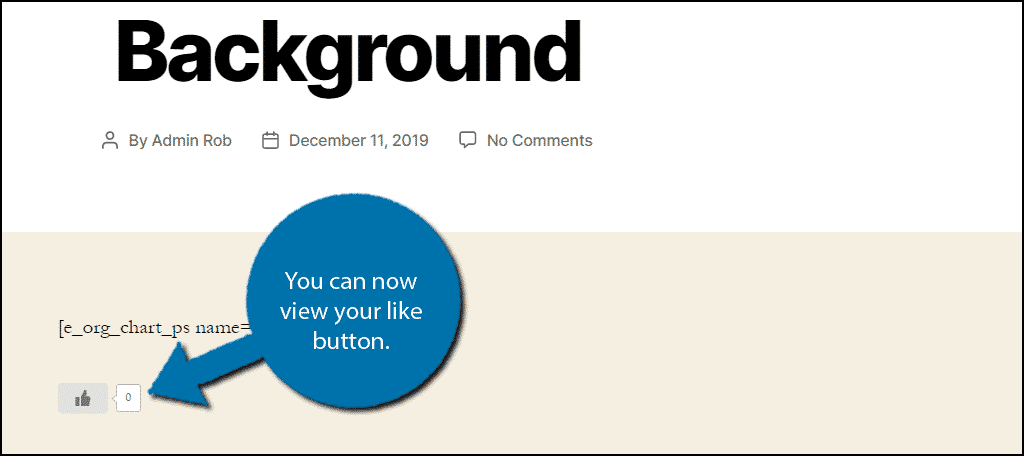
Congratulations, on setting up your very own Ajax like button on your WordPress content.
Take Advantage of The Comment Section
The comment section is often under-utilized by new web developers. It is one of the most important assets that allows you to communicate with visitors. Many beginners think that they will not get enough comments for it to reflect well, but that is not true if you just do one thing.
Ask them to leave feedback.
Yes, it really is that easy. Many readers do not engage with the comment section and that is true, but more are willing to do so when you ask them too. It’s like whenever you watch a YouTube video, virtually every single YouTuber asks you to leave a like, subscribe, and turn on notifications.
And that’s because it works.
Your website’s comment section is no different. If you ask, they will comment. Another approach is to try making a personal post asking for visitors to leave feedback for your website. If you’re trying to improve, your community is exactly who you should be listening too.
Do you think the ability to add an ajax like button to anything should be a built-in WordPress feature? Has the information you have collected helped you improve the content you offer visitors?