As your site grows, it becomes harder and harder to find what you are looking for as a visitor. While good navigation menus can help, adding a WordPress search bar can be the best solution and luckily, there are several ways to add one.
A search bar can help users quickly find what they are looking for and can oftentimes be more accessible than a navigation menu. The value of a search bar depends on the amount of content your site has.
The older the website, the more valuable the search bar becomes.
Today, I will show several methods that you can use to add a search bar in WordPress.
Why Add a Search Bar in WordPress?
A search bar serves a very obvious purpose, to help visitors find what they are looking for.
Without a search bar in place, the only option a visitor has is to utilize the other navigation systems. While a streamlined navigation system will get you very far, it is not enough when your website reaches a certain size.
For example, imagine a site that has over 1,000 blog posts. If you want to find a post from 2 years ago, you are going to have a really hard time finding it if you cannot search for the title.
A user would have a better shot of finding it if they typed the title and your site name into Google.
Another consideration would be something like an FAQ section for your site. Users can enter their questions into the search field and potentially find the answer to that question. This can help them avoid having to call or send an email.
Since your goal should be to keep visitors on your site and make their experience as simple as possible, a search bar is a great addition to any site. Luckily, there are several ways to add one in WordPress.
Method 1: Using the Search Block
The Gutenberg editor comes with a variety of blocks that site owners can use to add features, and sure enough, there is a dedicated Search block to add a search bar in WordPress.
This block can be placed on any post, page, or even in a widget area. It is very simple in terms of functionality and creates a site-wide search. It is not as robust as a dedicated plugin, but it works well on simple blog sites.
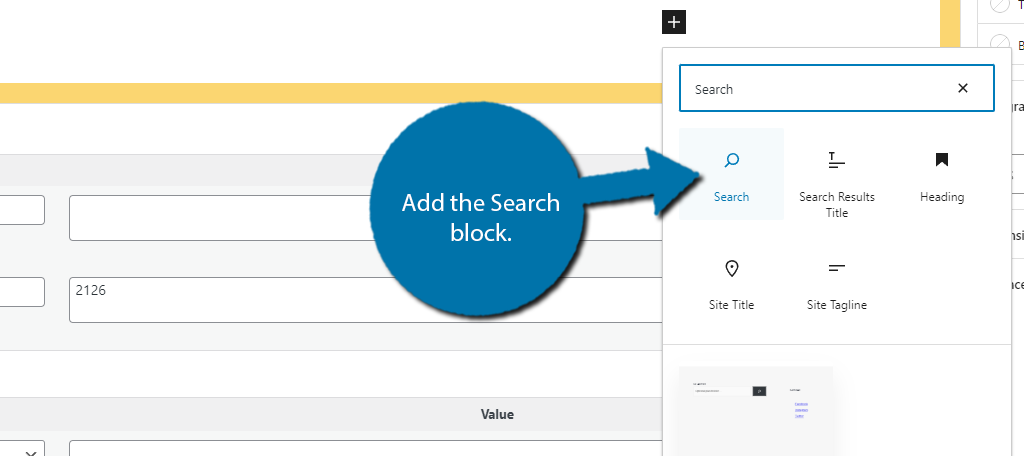
Start by going to the area of WordPress you want to add the block to. In this case, I will just go to a post. Once there, click on the “+” button and search for the Search block. Add it to the post.
The search bar will appear in that post, page, or widget area. Its appearance is based entirely on your theme, thus yours may look different from mine. If you are comfortable with coding, you can customize the appearance by editing your theme.

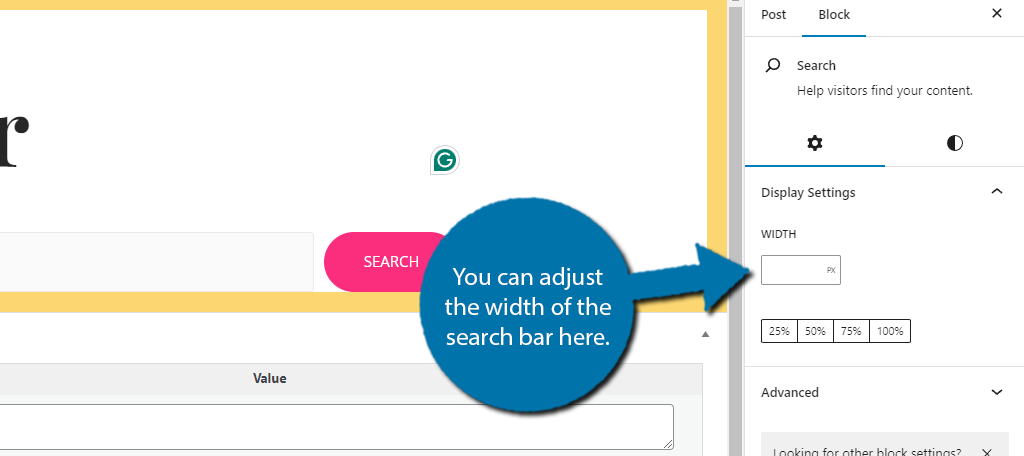
While you cannot edit the appearance, you can adjust a few settings. For example, you can create your own placeholder text like “Search…” and can customize the text of the “Search” button. To edit these fields, just click on them and replace the text.
You can also use the block settings to alter the size of the search bar. Or more specifically, the width.
And that covers everything you need to know about the Search block in WordPress. Again, the search functionality is very limited. For more options and fine-tuned search results, you will want a dedicated plugin.
Method 2: Ivory Search Plugin
The second method we will look at is using the Ivory Search plugin. This plugin offers websites an advanced search functionality that can be customized by creating your own search forms. This can help you limit what appears in searches.
That said, just the default options will be enough for most sites. Thus, it doesn’t need to get complicated.
Placing the search bar in WordPress is very simple as the plugin generates a shortcode for you after making the search form. Simply add the shortcode and the search bar will appear in that location.
Step 1: Install Ivory Search
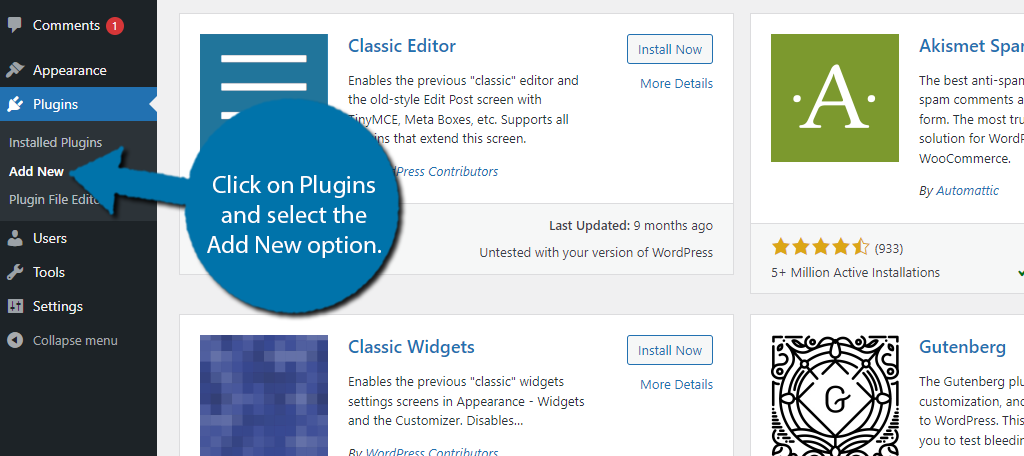
Let’s start by clicking on Plugins and selecting the Add New option on the left-hand admin panel.
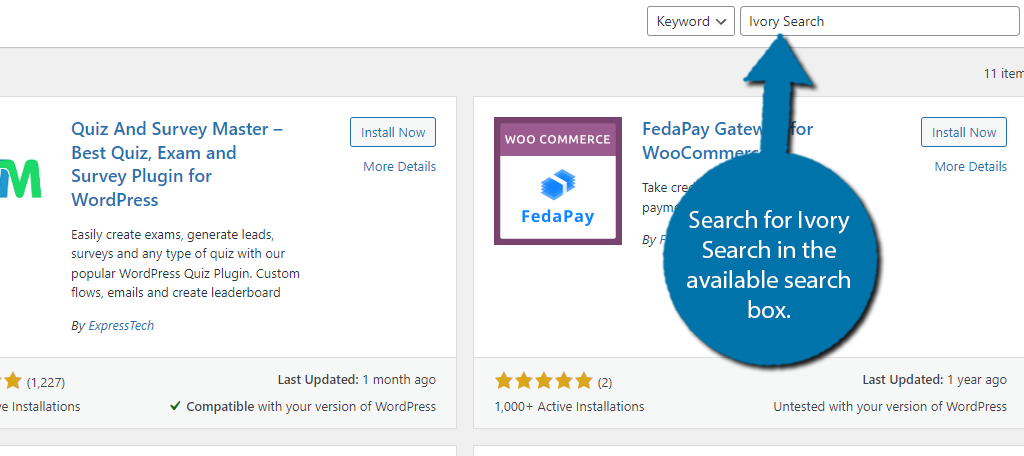
Search for Ivory Search in the available search box. This will pull up additional plugins that you may find helpful.
Find the Ivory Search plugin and click on the “Install Now” button and activate the plugin for use.
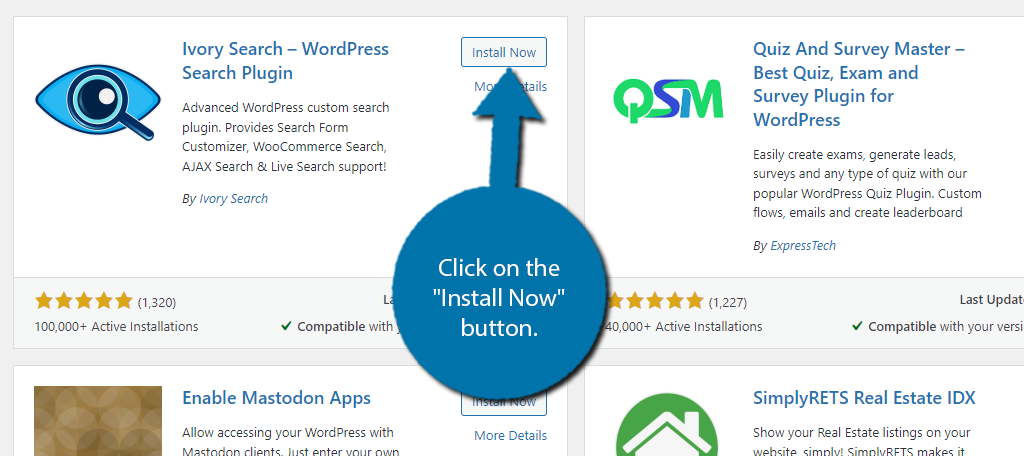
Upon activation, the plugin will ask if you want to receive email notifications about the plugin. Feel free to skip or accept as it does not affect using the plugin.
Step 2: Search Forms
By default, the plugin is ready for use, and you can add a search bar anywhere in WordPress with the proper shortcode. That said, it is possible to customize the search functionality of this plugin by editing a search form or making a new one.
While this may sound very complicated, you are just using a series of switches to decide what content appears in a search and what doesn’t. Again, the default search will work well for most sites, but the choice is yours.
If you want to test the default search first, feel free to skip to step 3 to add the shortcode to make the search bar appear in WordPress.
Otherwise, click on Ivory Search and select the Search Forms option.
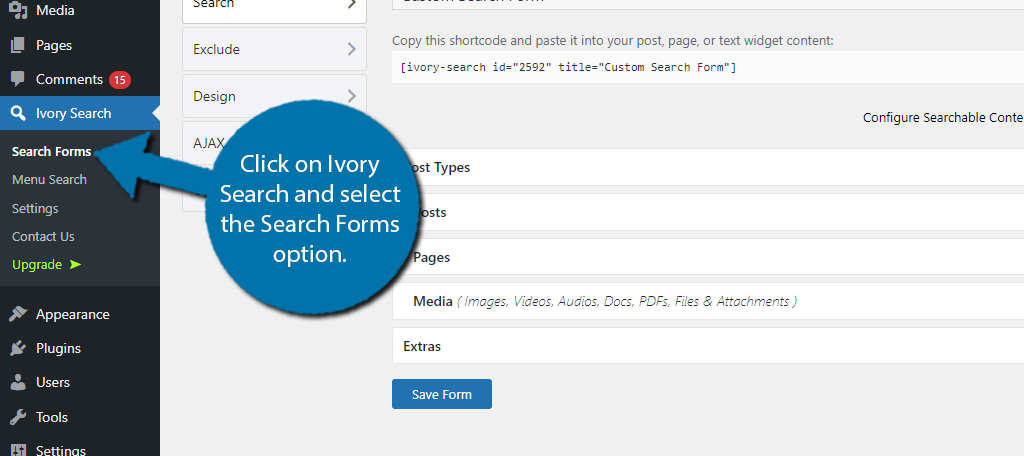
By default, the plugin provides four search forms. You can edit any of them as you see fit. In this case, I will just edit the Custom Search Form, but the process is the same no matter which one you select, or if you create a new one.
Once inside, you will see the content that users can see. This includes Posts, Pages, and Media types. So, if I click on Pages, there are two options. The first is to search all pages, and the second is to search from specific pages.
Activate the switch to search from specific pages.
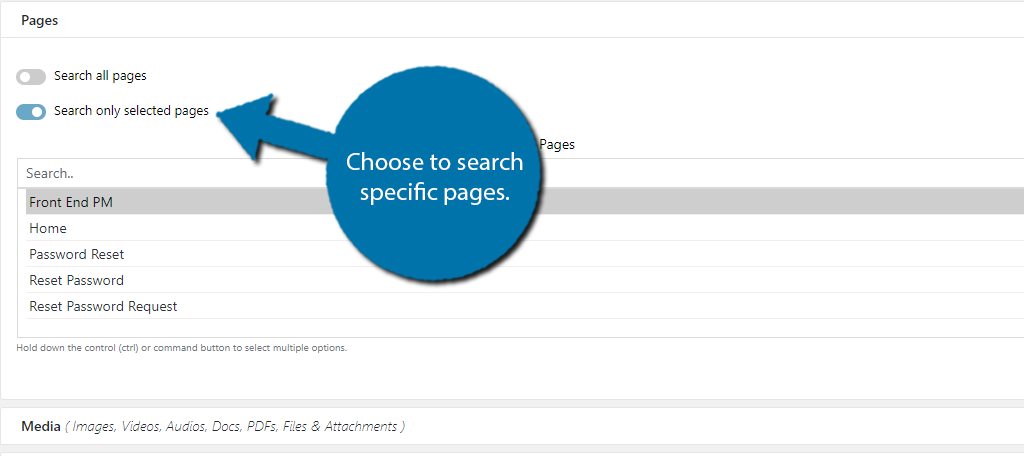
You can hold down the Control or Command button to highlight the pages that you want the plugin to search from. In this, case, I selected everything except my Homepage.

This process is the same for posts. Media types are locked behind the Pro version, but if you purchase it, you can ignore content types like images, videos, and so on. Click on the “Save Form” button at the bottom after configuring the search form.
Step 3: Add the Search Bar in WordPress Using Shortcode
Now that the search form has been modified, or if you just want to use the default option, it is time to add the search bar in WordPress using the shortcode. Luckily, this is pretty easy.
First, to find the shortcodes, we simply need to revisit the search Forms area. You will see the shortcode next to the search form it is for.
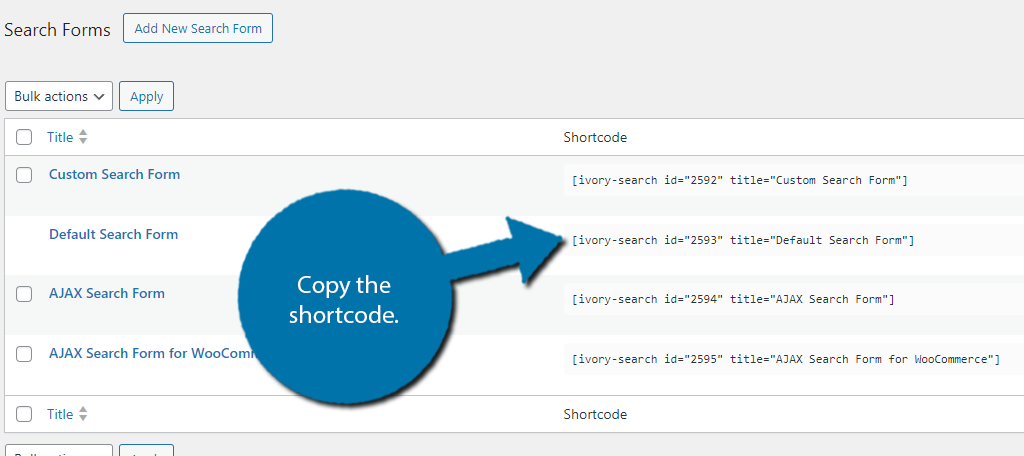
With the shortcode copied, go to any post, page, or widget area that you wish to add the search bar to in WordPress. Once there, just add a Shortcode block and paste the shortcode inside of it. Save the changes and view it on your website.

And that’s all there is to it. Be sure to test out the search functionality. You can tweak the search form if needed at any time.
Make Sure Visitors Can Find What They Are Looking For
The entire point of adding a search bar is to help visitors find what they are looking for. Not having one can be disastrous for your website. Imagine trying to navigate Amazon without being able to search for an item.
It just isn’t going to work very well.
Luckily, it is really easy to add a search bar in WordPress. The two methods above showcase exactly how to do it, but just be aware that there are more methods and alternative plugins you can use.
I hope you found this tutorial helpful in learning how to add a search bar in WordPress.
Which method did you use to add a search bar in WordPress? Did you use a different search bar plugin?
Got this error :
Parse error: syntax error, unexpected ‘role’ (T_STRING) in C:\xampp\htdocs\short_vending_wp\wp-content\themes\short-vending\functions.php on line 193
line 193 > $form = ‘
Is it possible to limit the search to a “Brand” or “Category” of a Woocommerce product?
Thank you
Yes, it is. Some WooCommerce plugins available have this built-in specifically.